Pink Bath Remodel
/


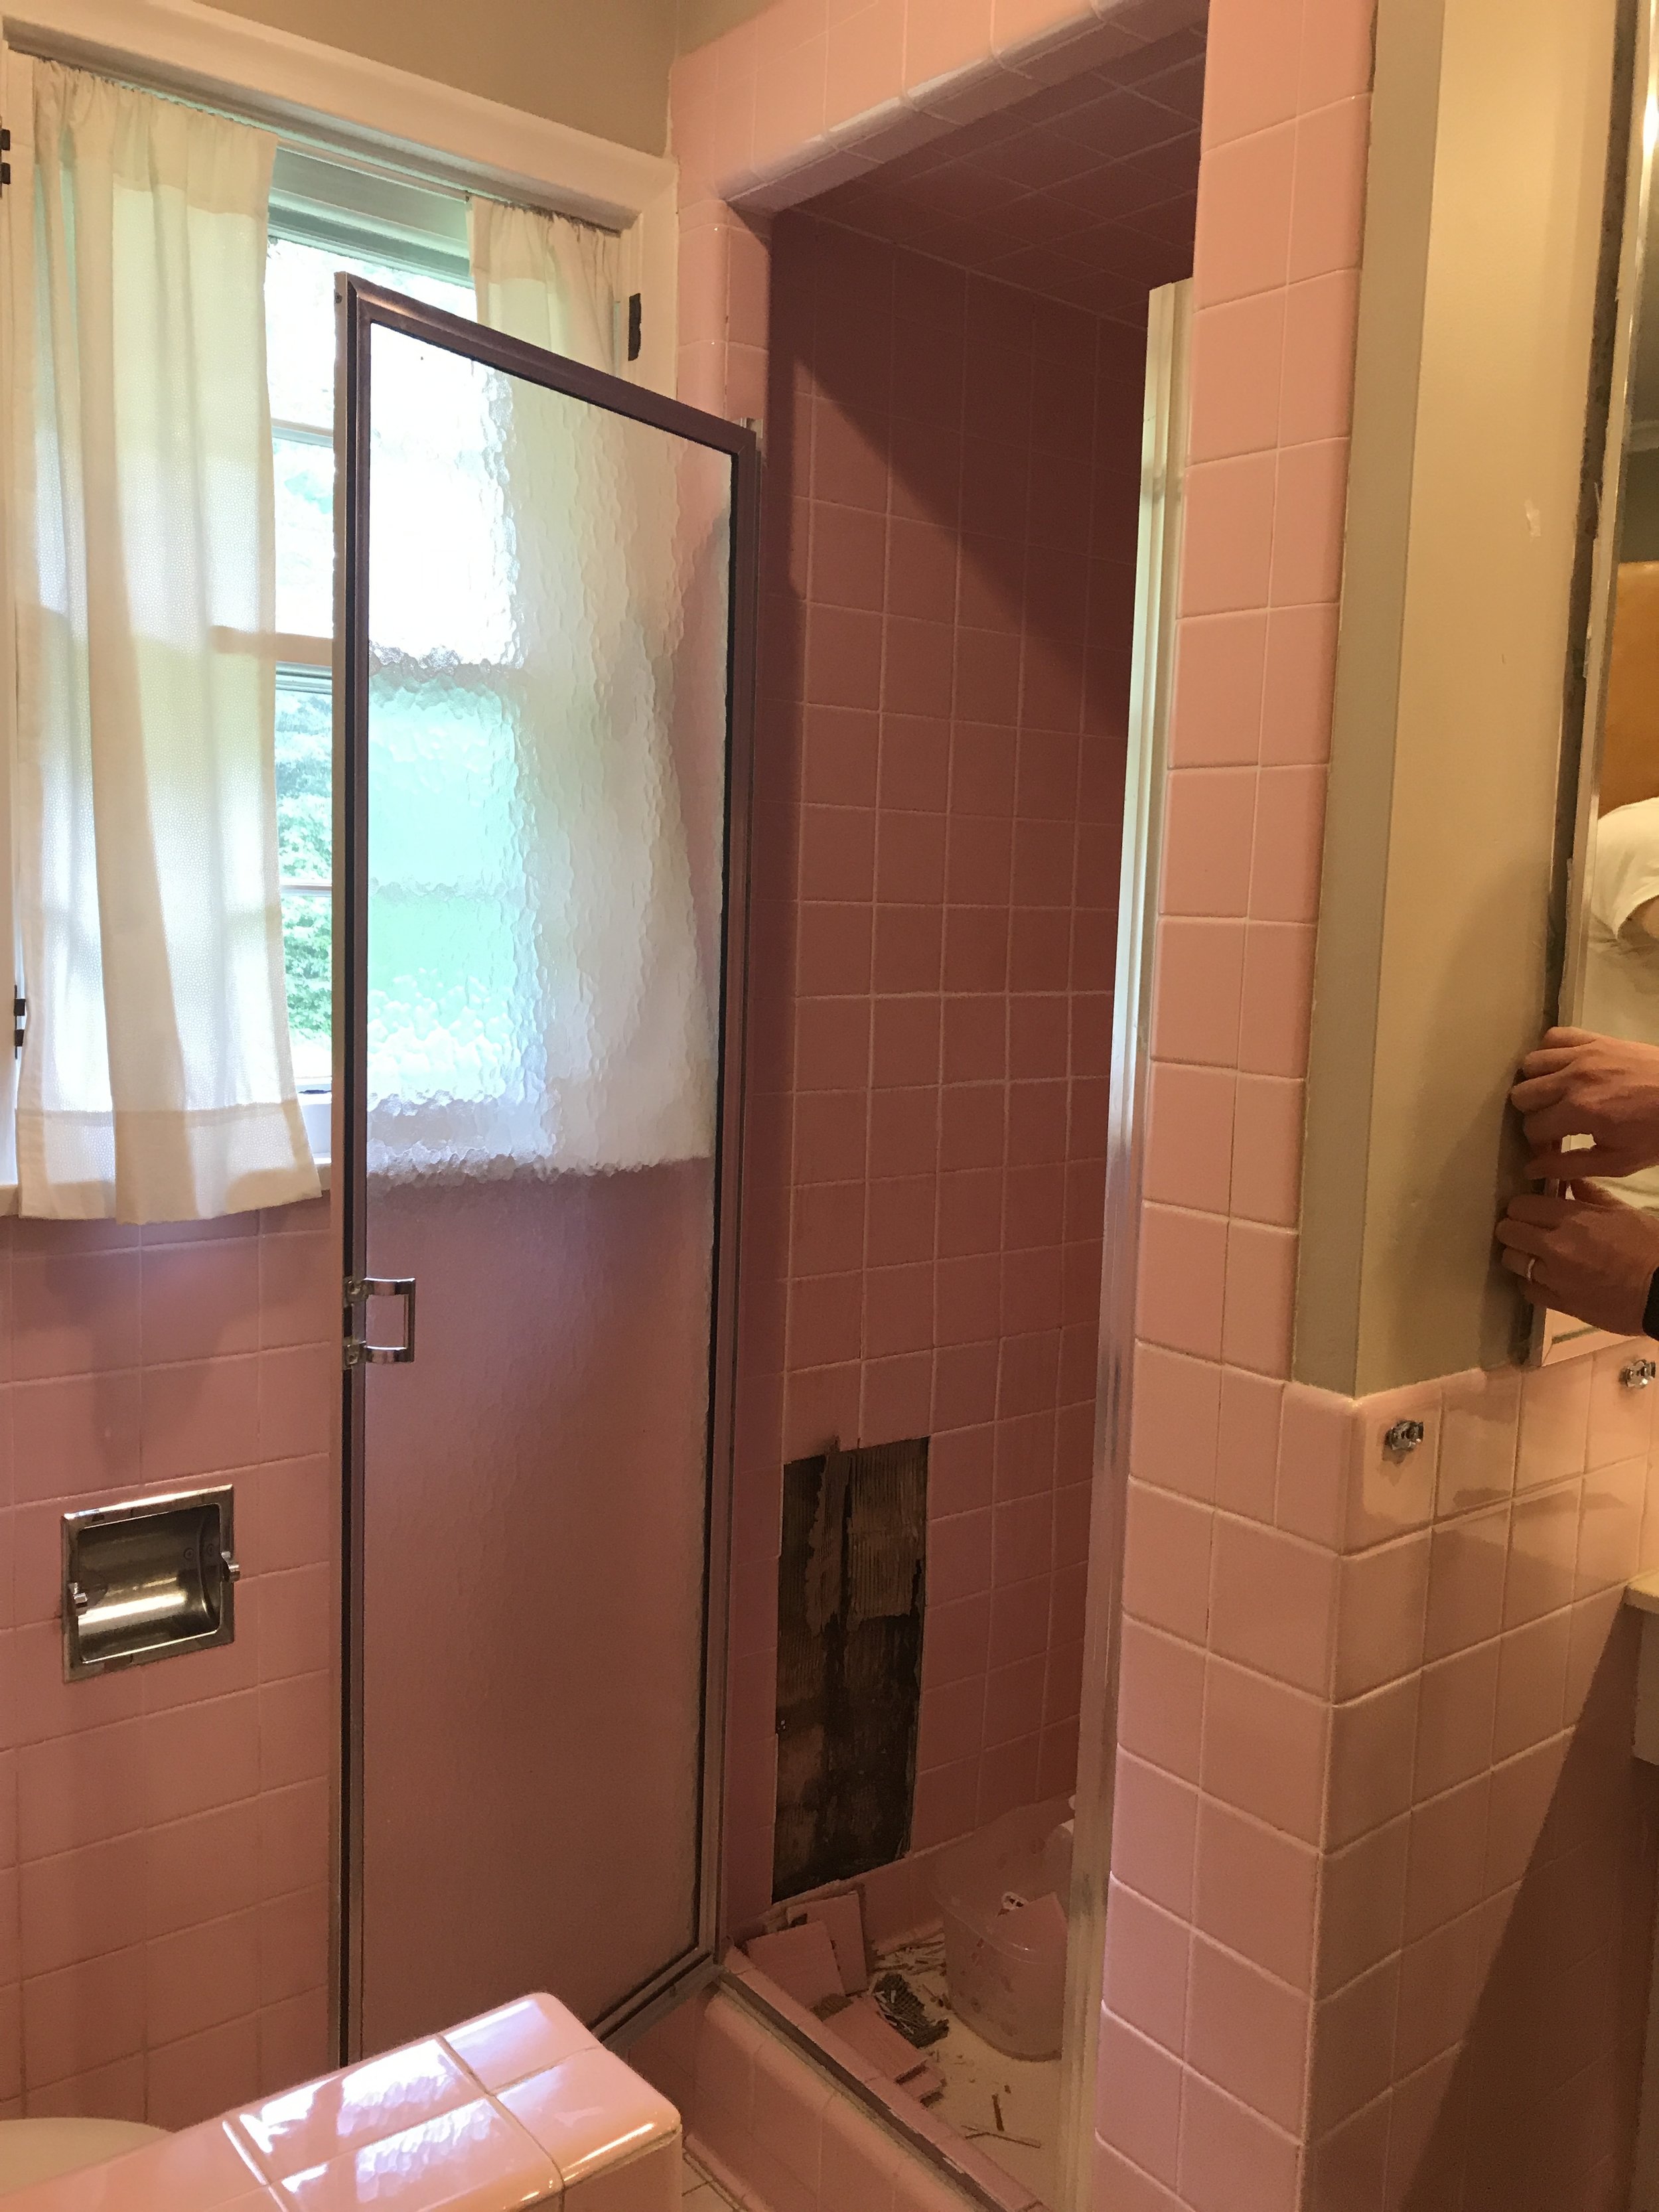
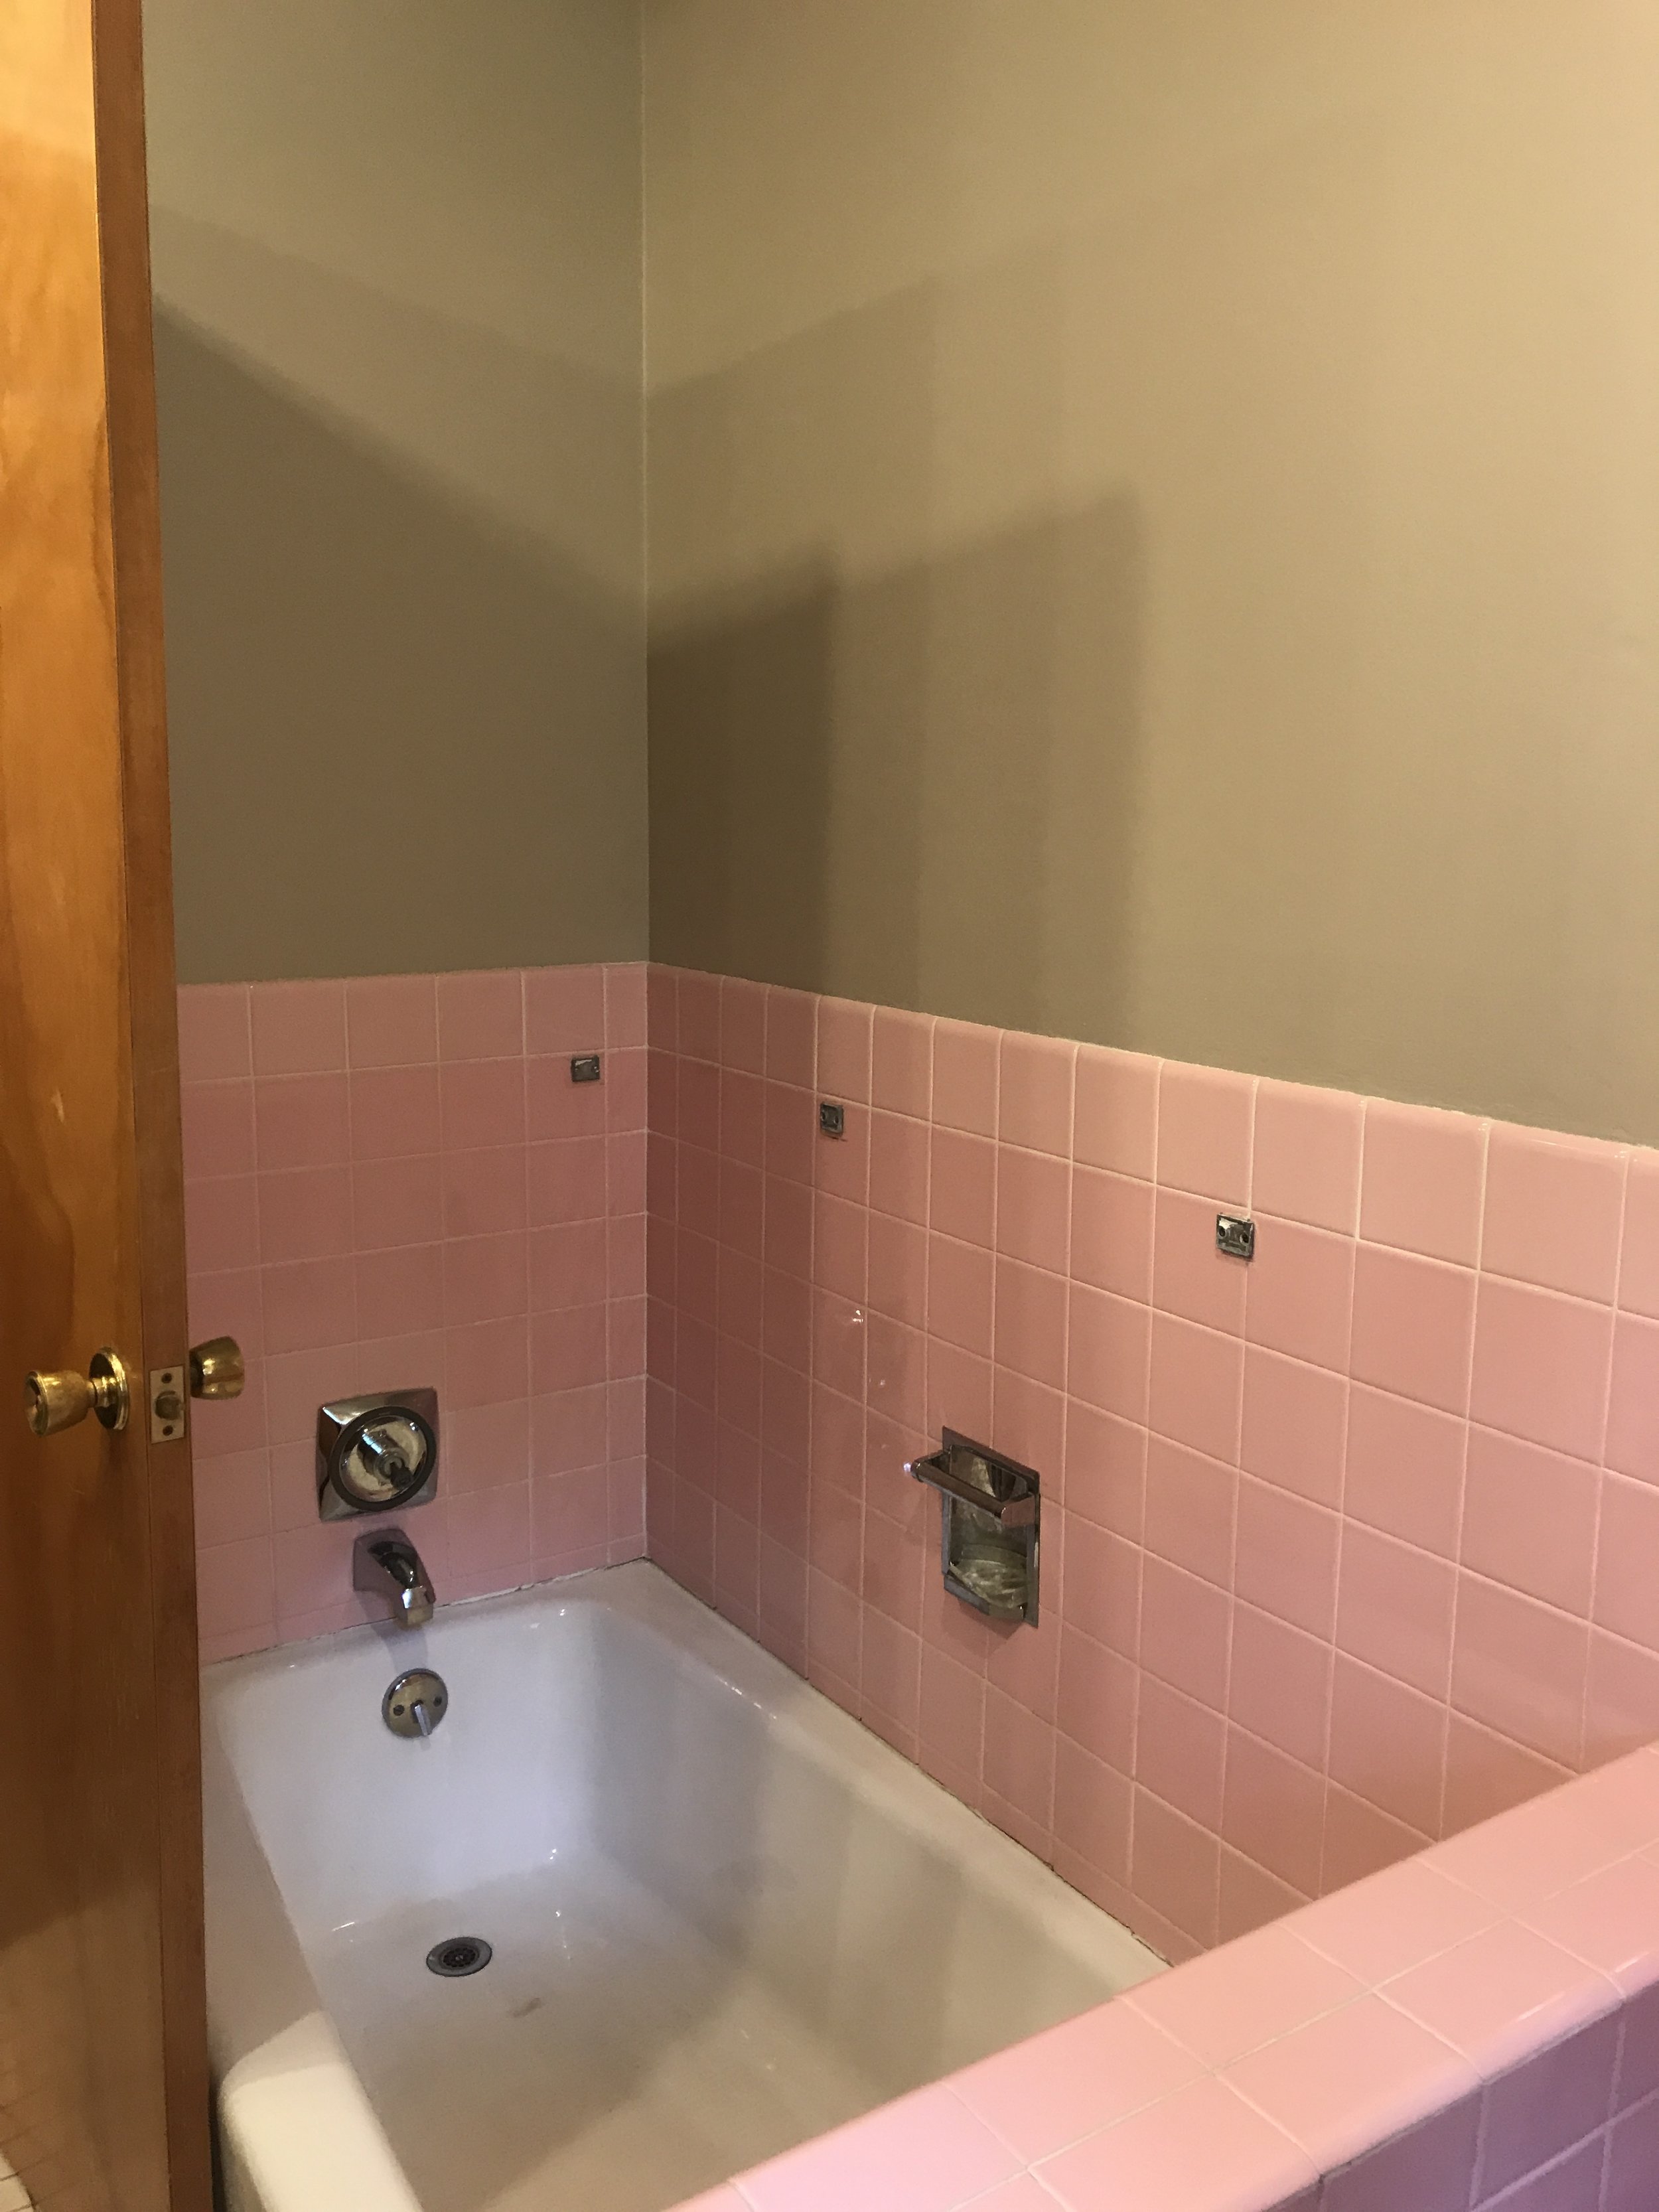
Our pink bathroom got a makeover! Before I get started with all the details, let me preface with a few notes. The bathroom hadn’t been updated—except for basics like paint and accessories—since it was built in 1960. How do I know this for sure since we only lived in the house for 7 years… because we found newspaper wrapped around electrical wiring from the 1960 Nixon/Kennedy election. No kidding. Bottom line, it needed to be gutted. Scroll through these photos and check out the crumbling pink tile shower.
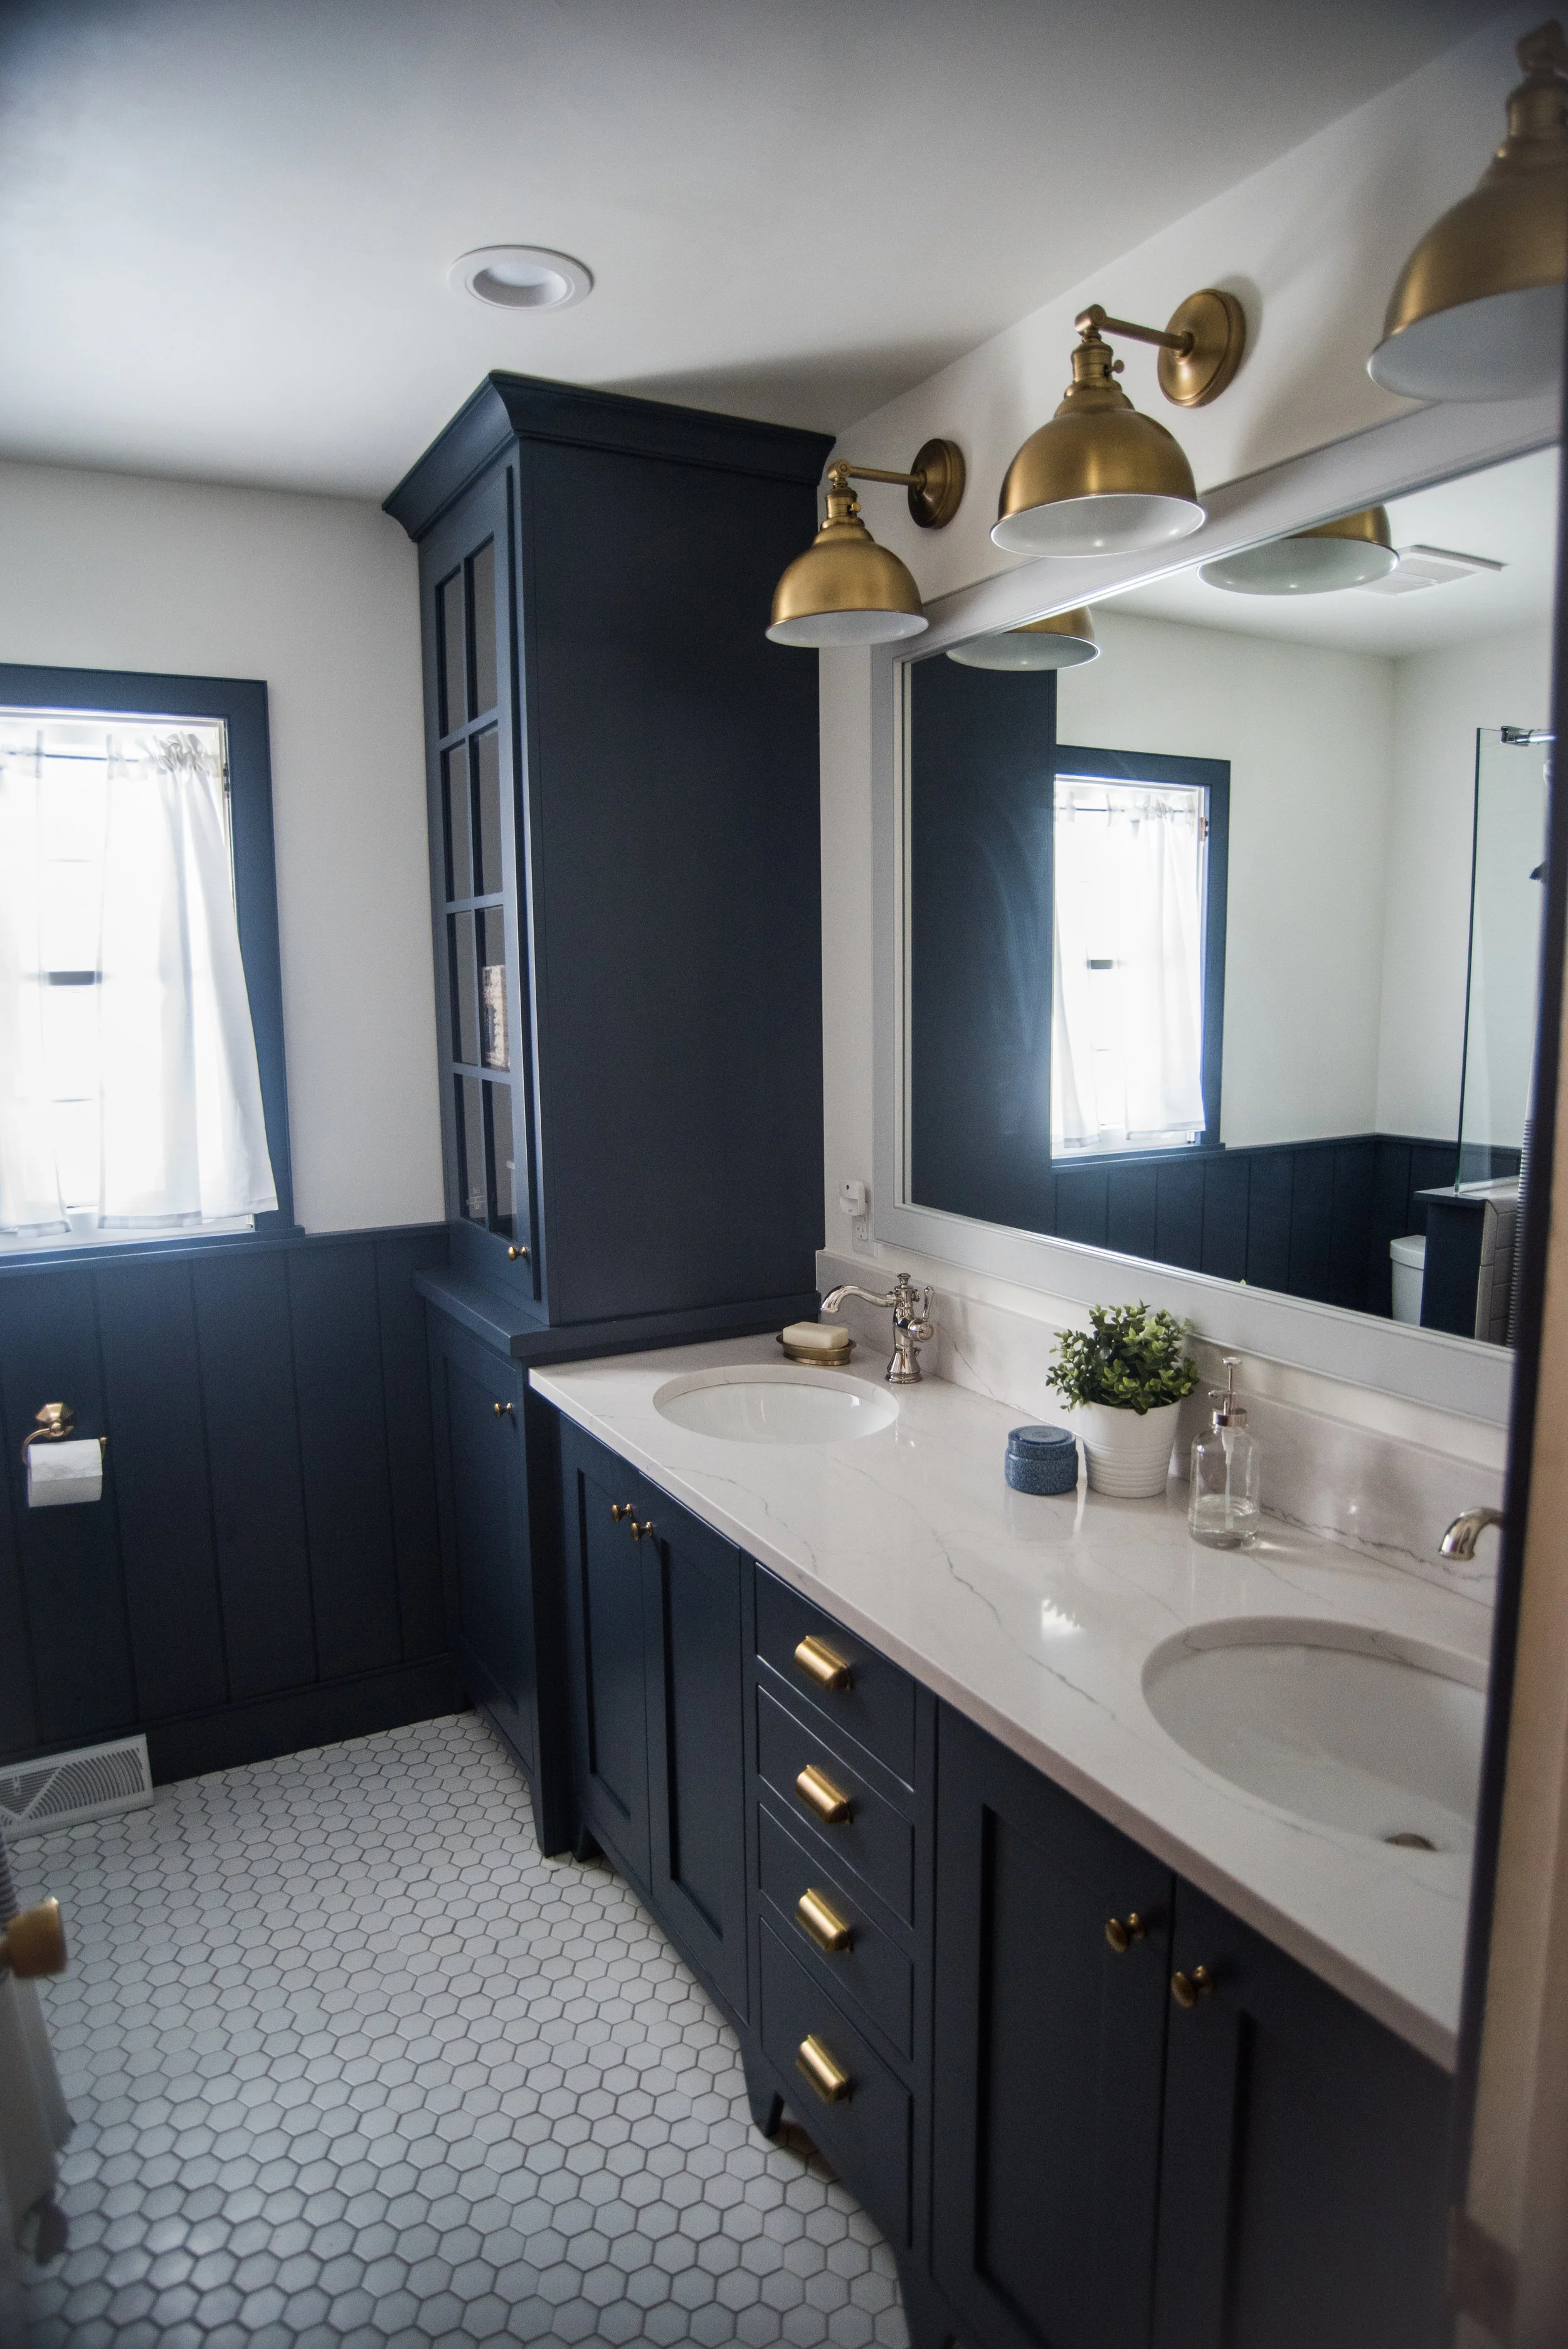
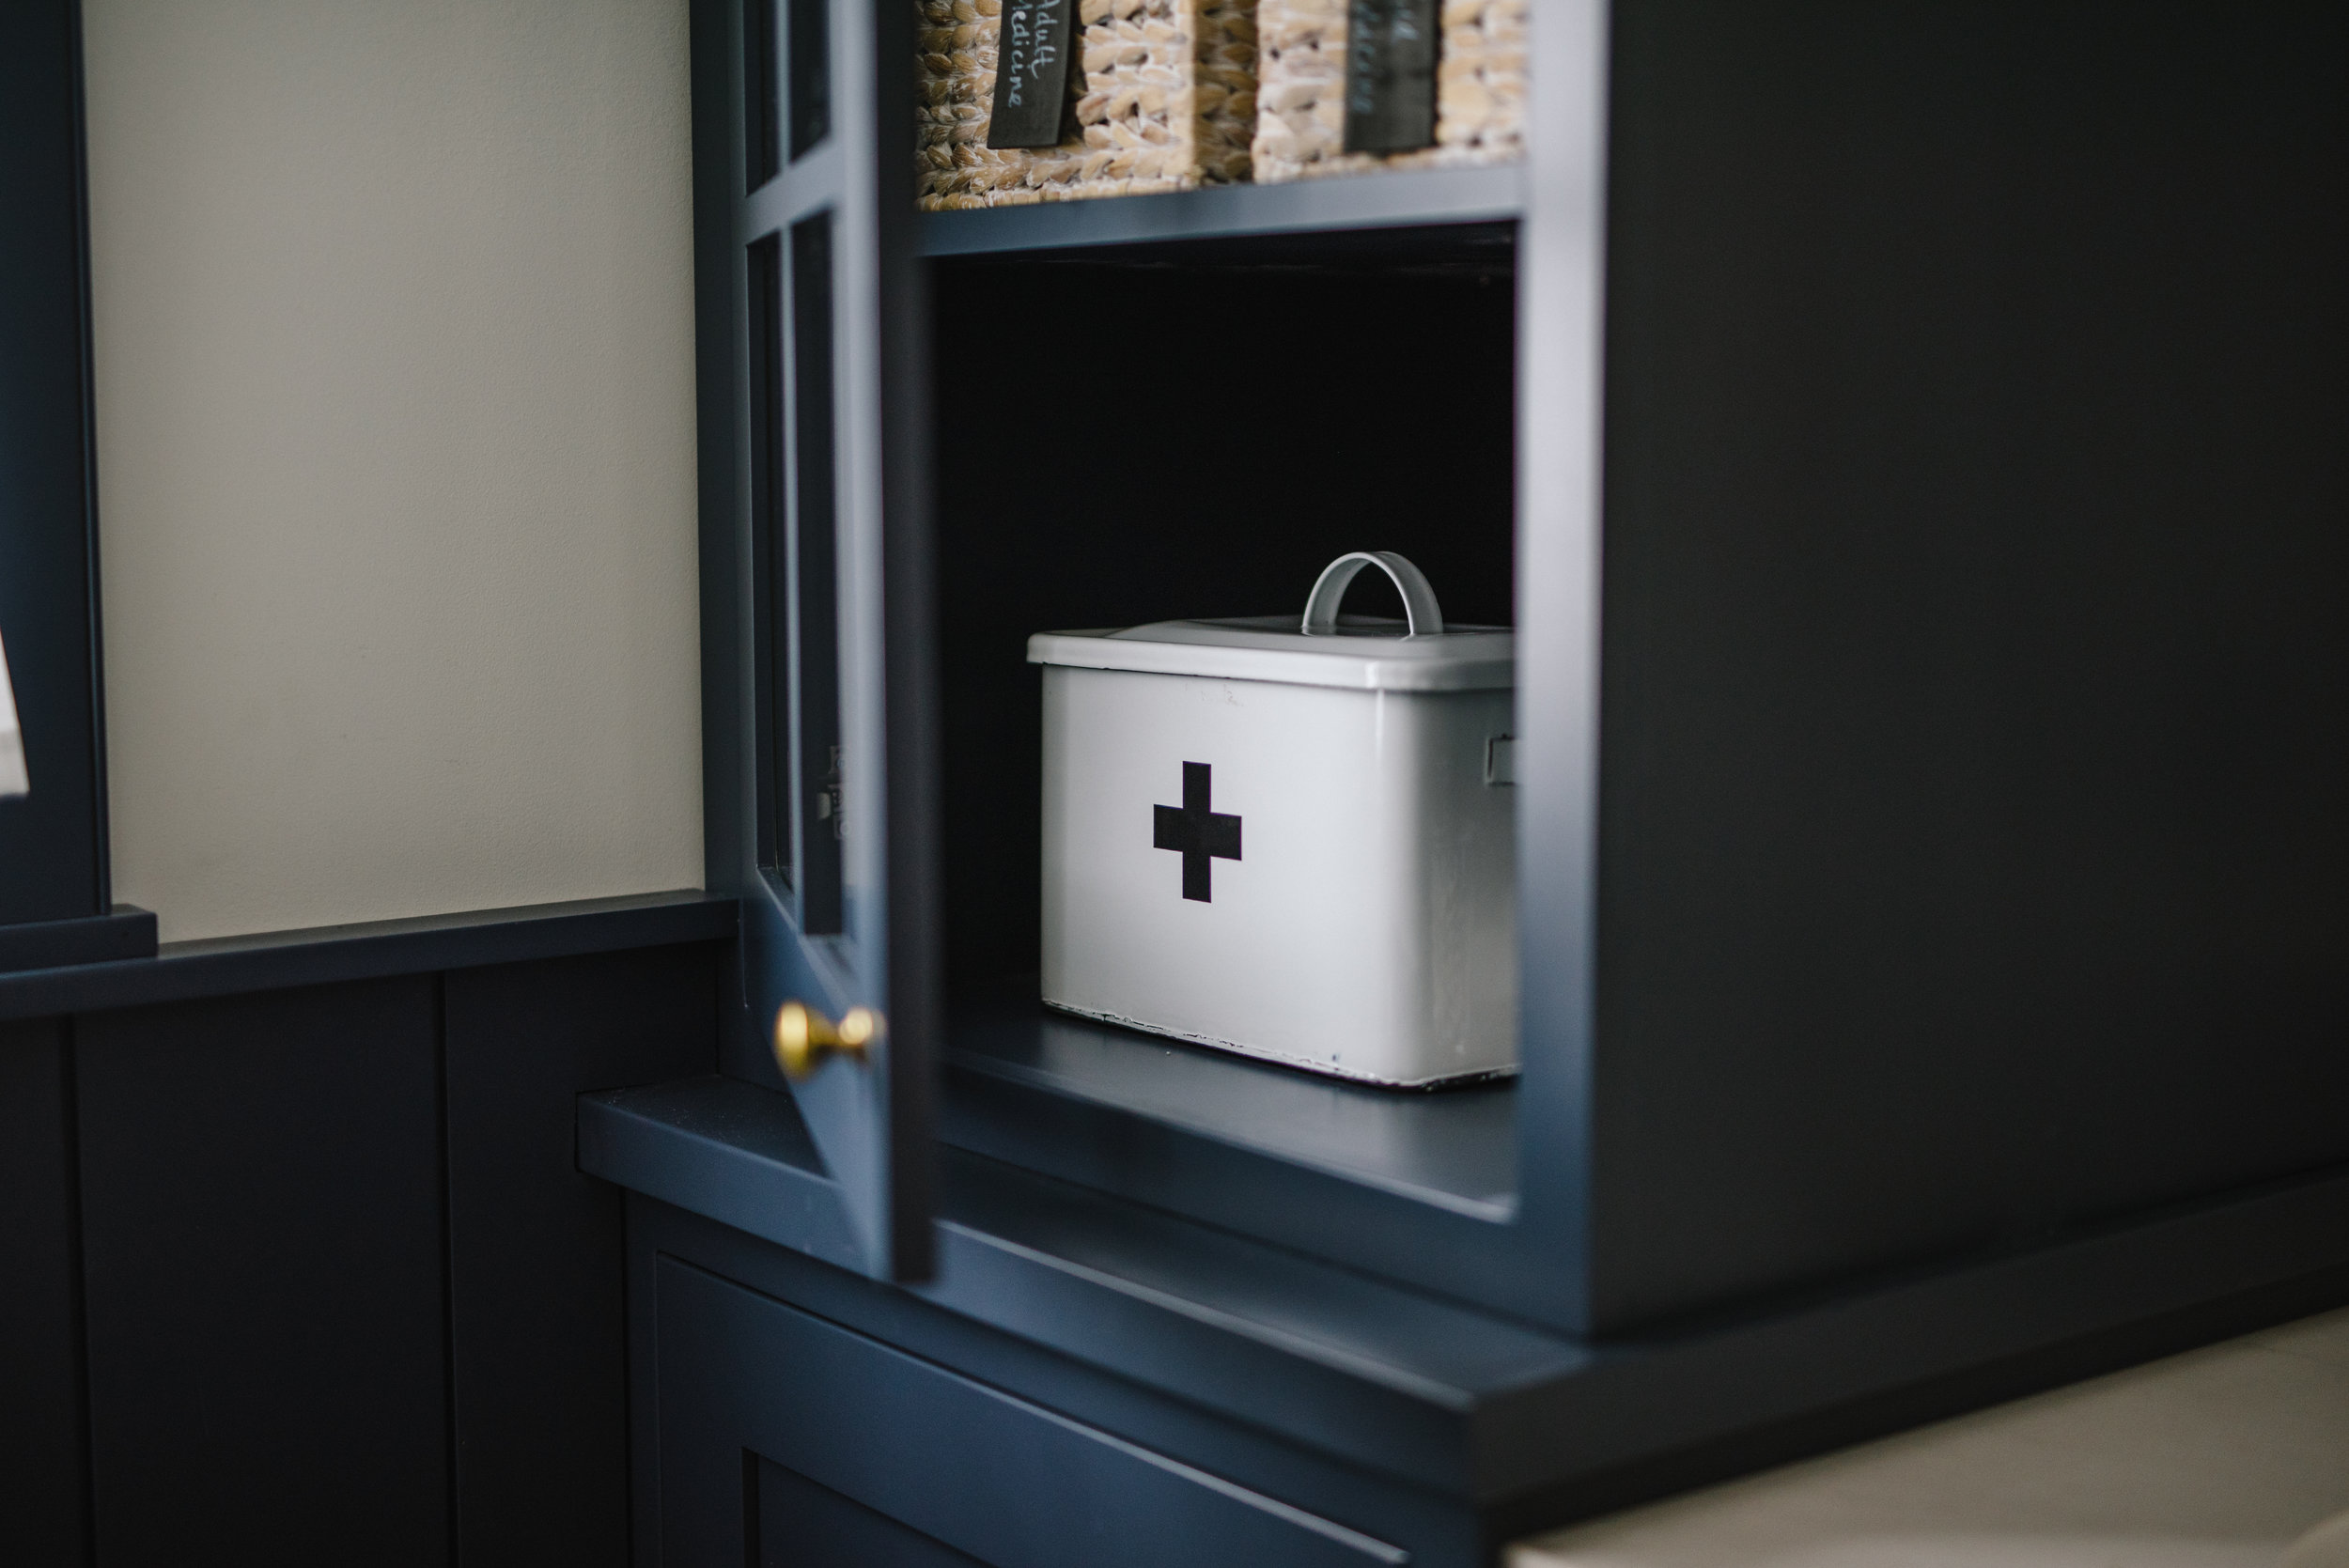
This particular bathroom is the main bath off of our kitchen & living room and is also our kids’ bath. My goal: attractive, functional & kid friendly. For that reason we decided to ditch the tiny shower (it was dark and cramped) and combine it with our bath. We kept the original cast iron tub because it was in good shape, and nothing can truly replace old school cast iron! Combining the shower and tub allowed us to add a tall cabinet for towels, medicine, etc, as well as a double sink so two kids could brush their teeth at the same time. I also included four drawers on the main cabinet so each child could have their own drawer—to minimize arguments, of course. : )

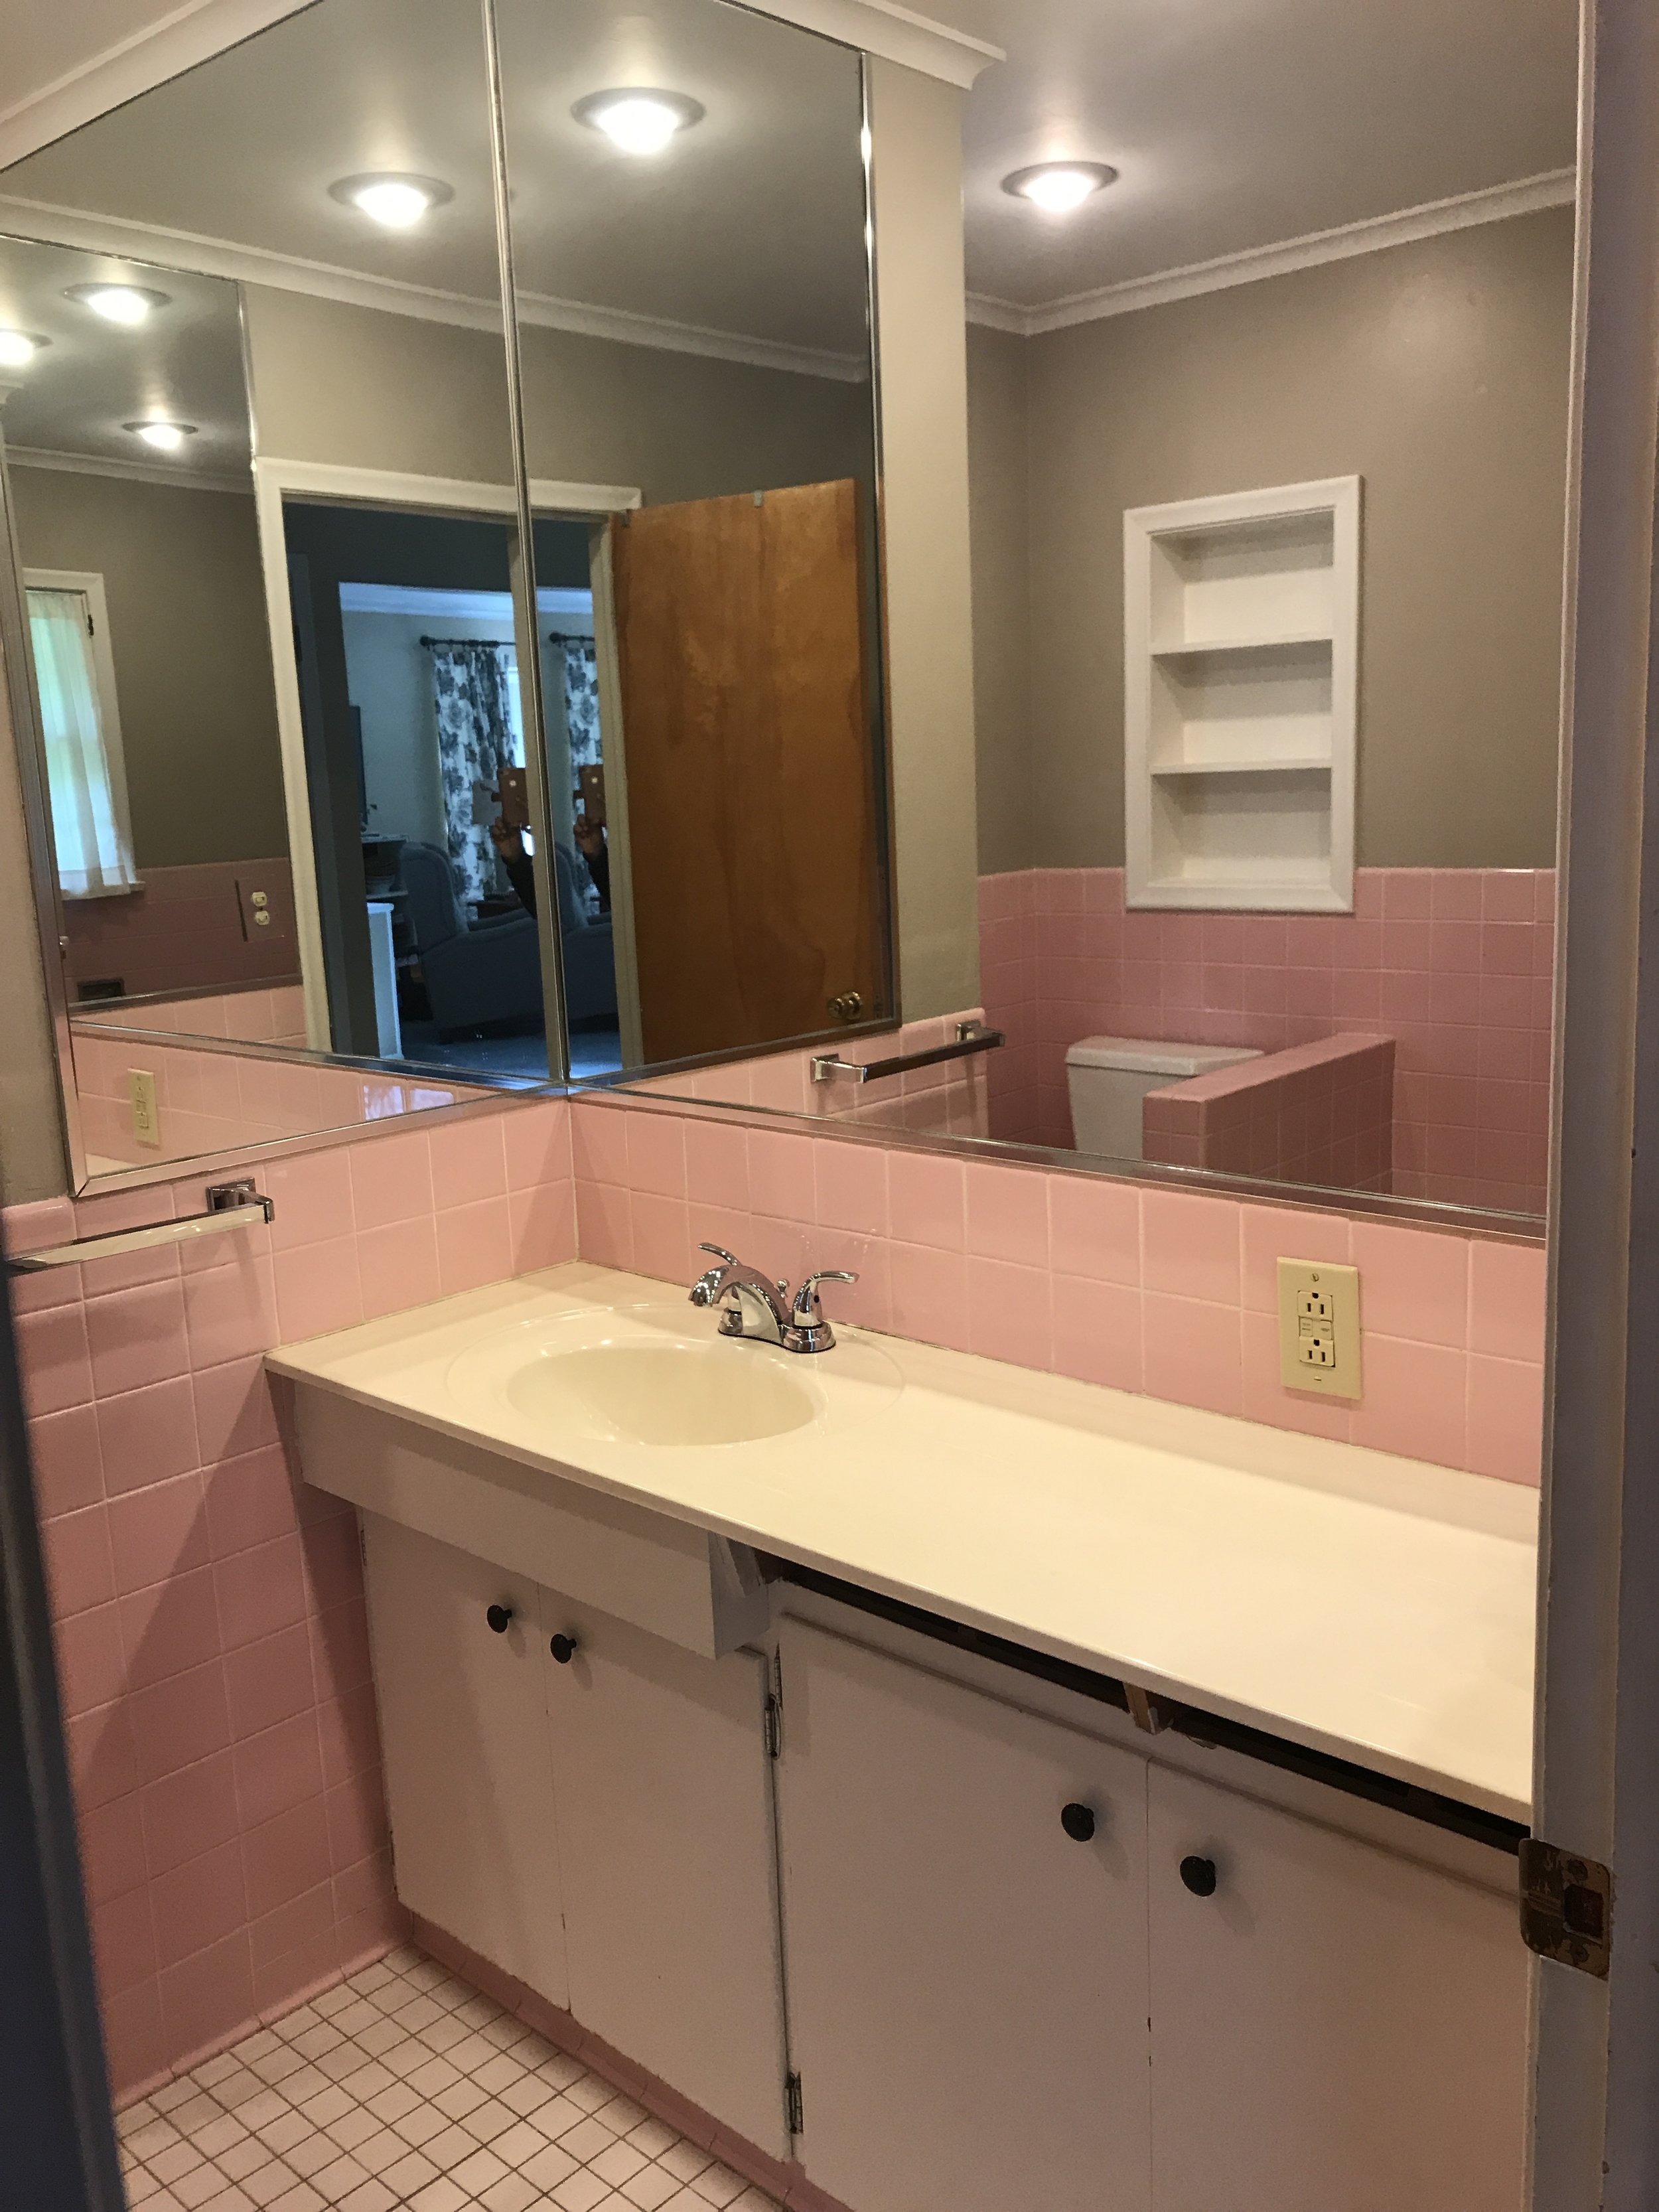

This is is basically how the bathroom looked when we purchased the house in 2011. We stripped the wallpaper and painted it a greige, but until we demoed it this past summer, 2018, it only had basic cosmetic upgrades.

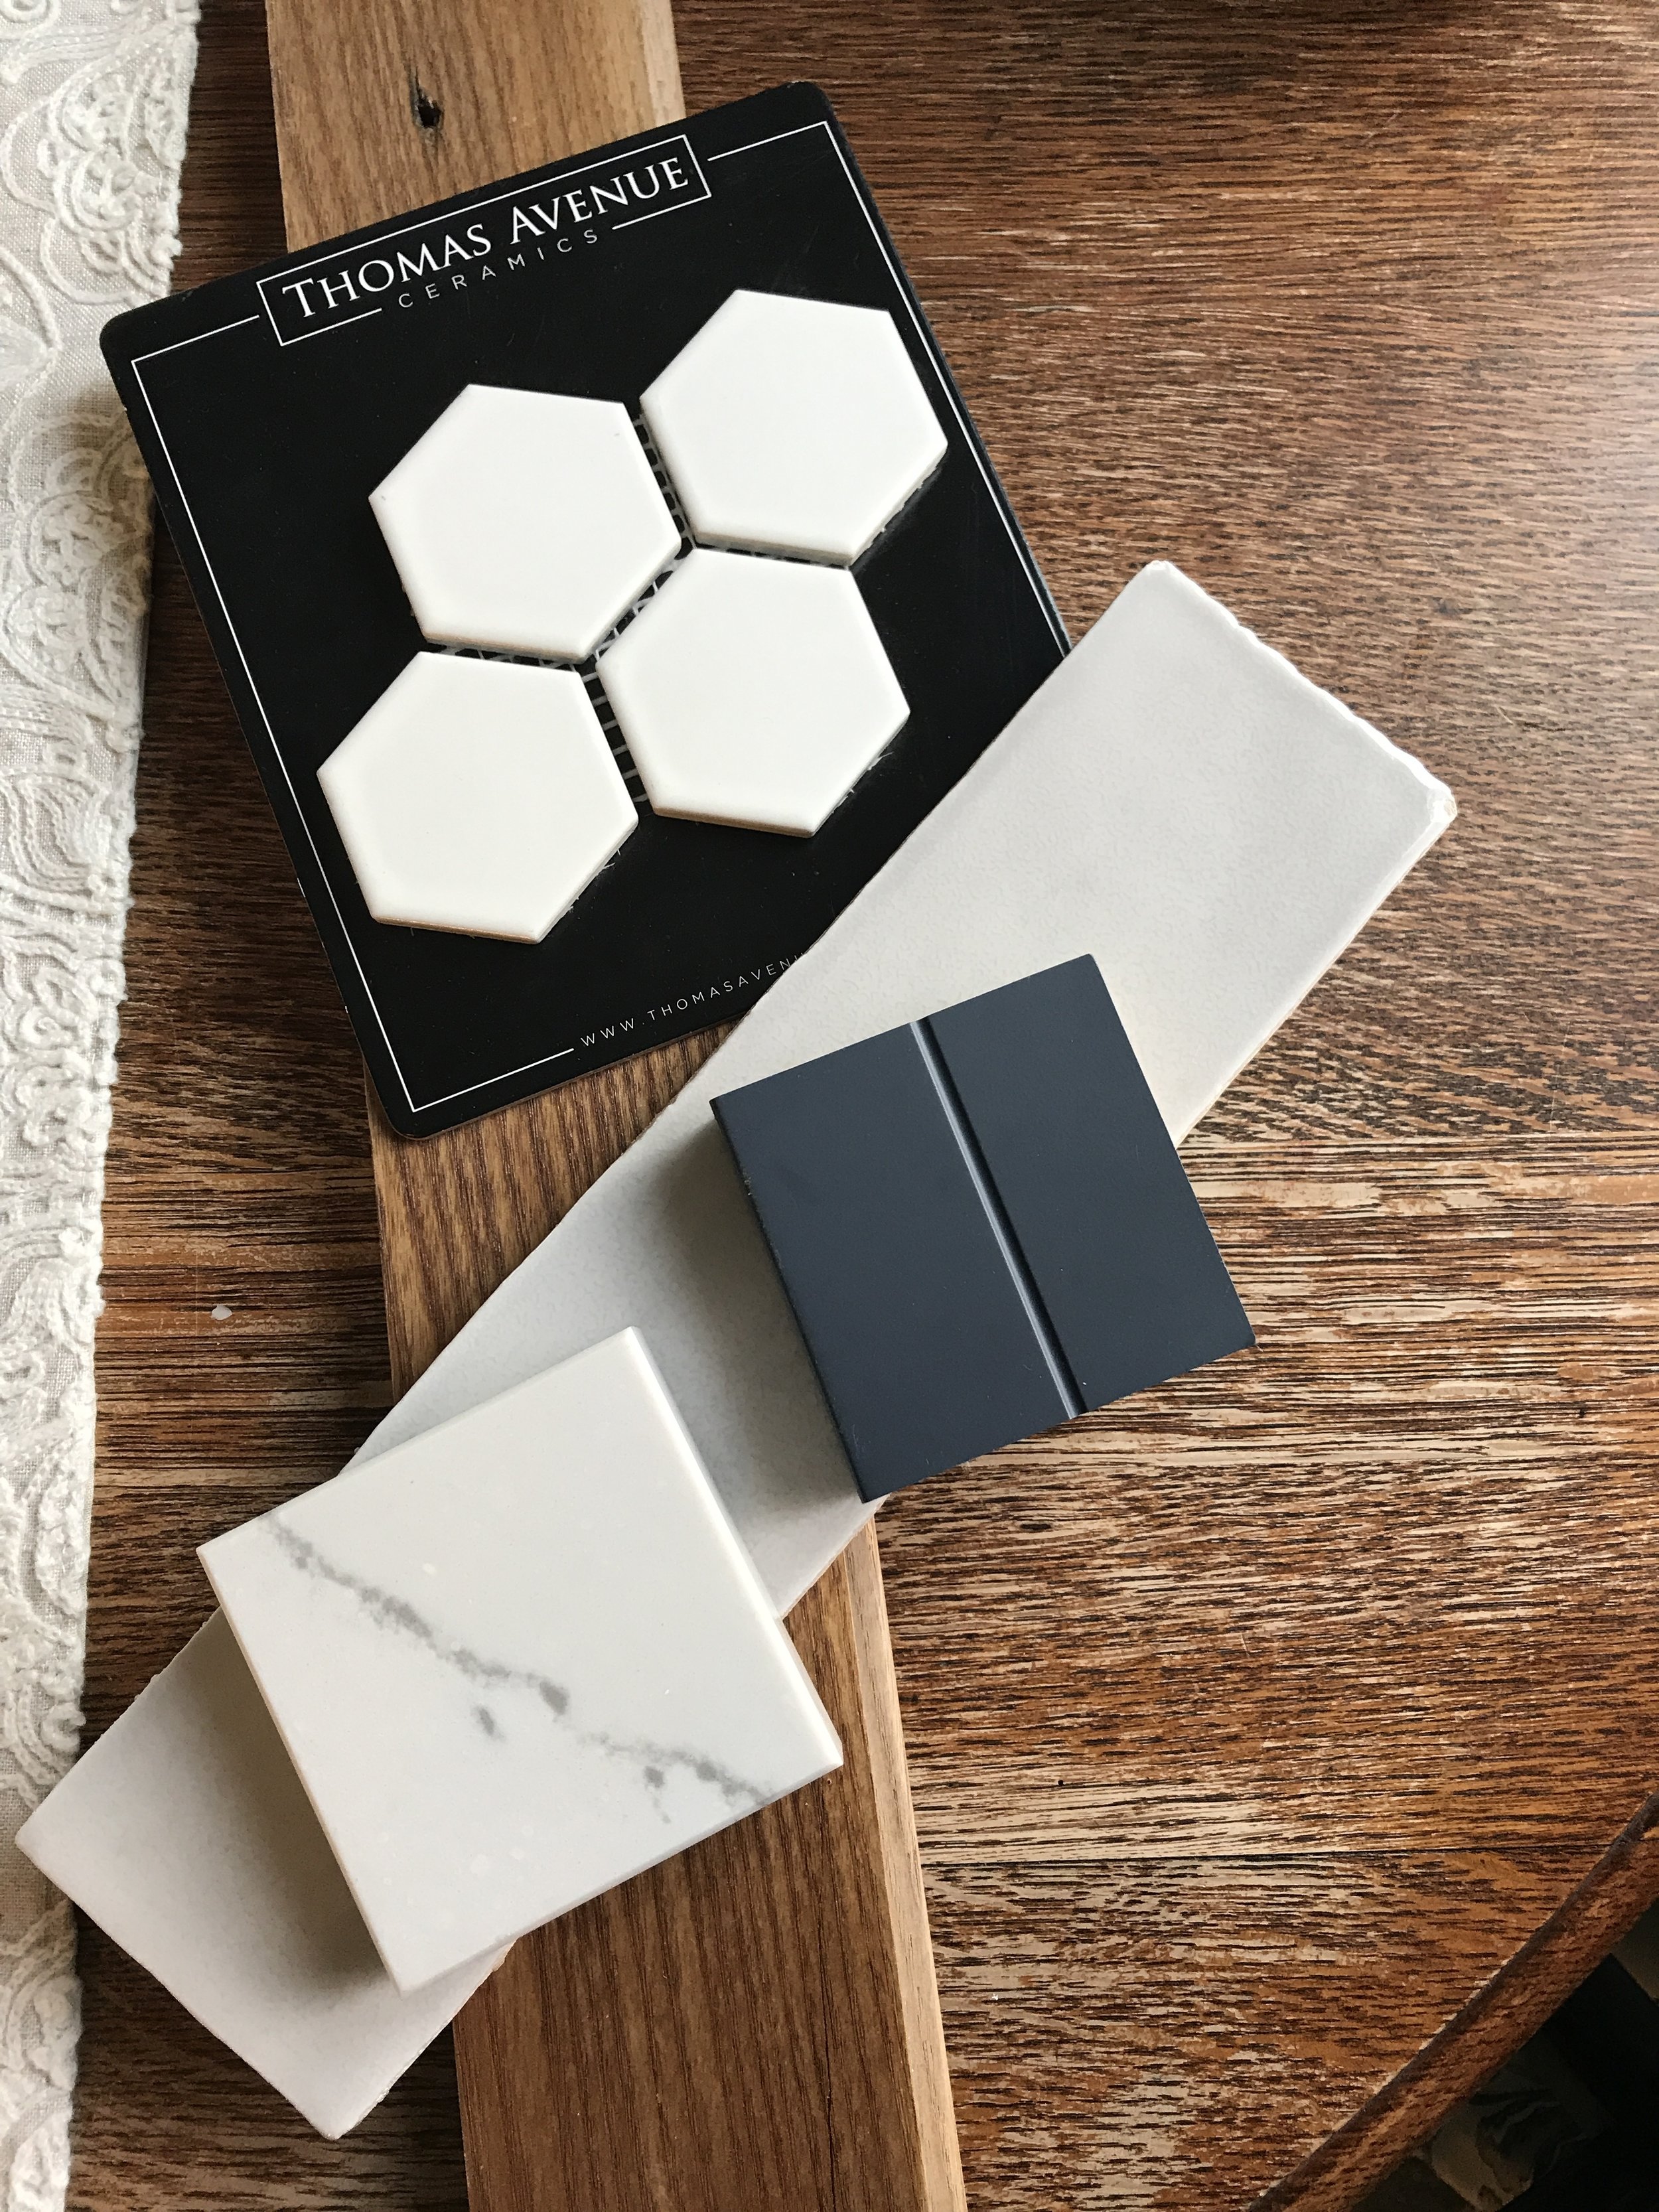
I saw this photo via instagram last spring and loved it, though I was a bit gun shy going all blue in my bath—so I blended these ideas with a simply white by Benjamin moore and a light warm gray. You can see my tile, cabinet and counter choices below. inspiration via Sabbe Interior Design


I love the wainscoting, substantial trim, and saturated color of this dining room. Inspiration via Sabbe Interior Design.
Blue has always been one of my favorite colors, so needless to say I’ve happily embraced the dark blue cabinet trend. I color matched a sample I found via the Sarah Sherman Samuel line by Semi-Handmade (a company that makes semi-custom fronts for Ikea cabinets), and went with simple Shaker in set doors. I had a local cabinet maker, Brian Stoll, make the cabinets and he did a beautiful job—basically I described what I was looking for and he sketched & built the cabinet. I love the deep inky blue! I was really inspired by the beautiful design work of Sabbe Interior Design as well as Jean Stoffer Design. And I pulled in my friend, Rebekah Dell throughout the entire process. She freelances as an interior designer and has a great eye. If she didn’t have a full time job, I would find away to work with her on all projects.
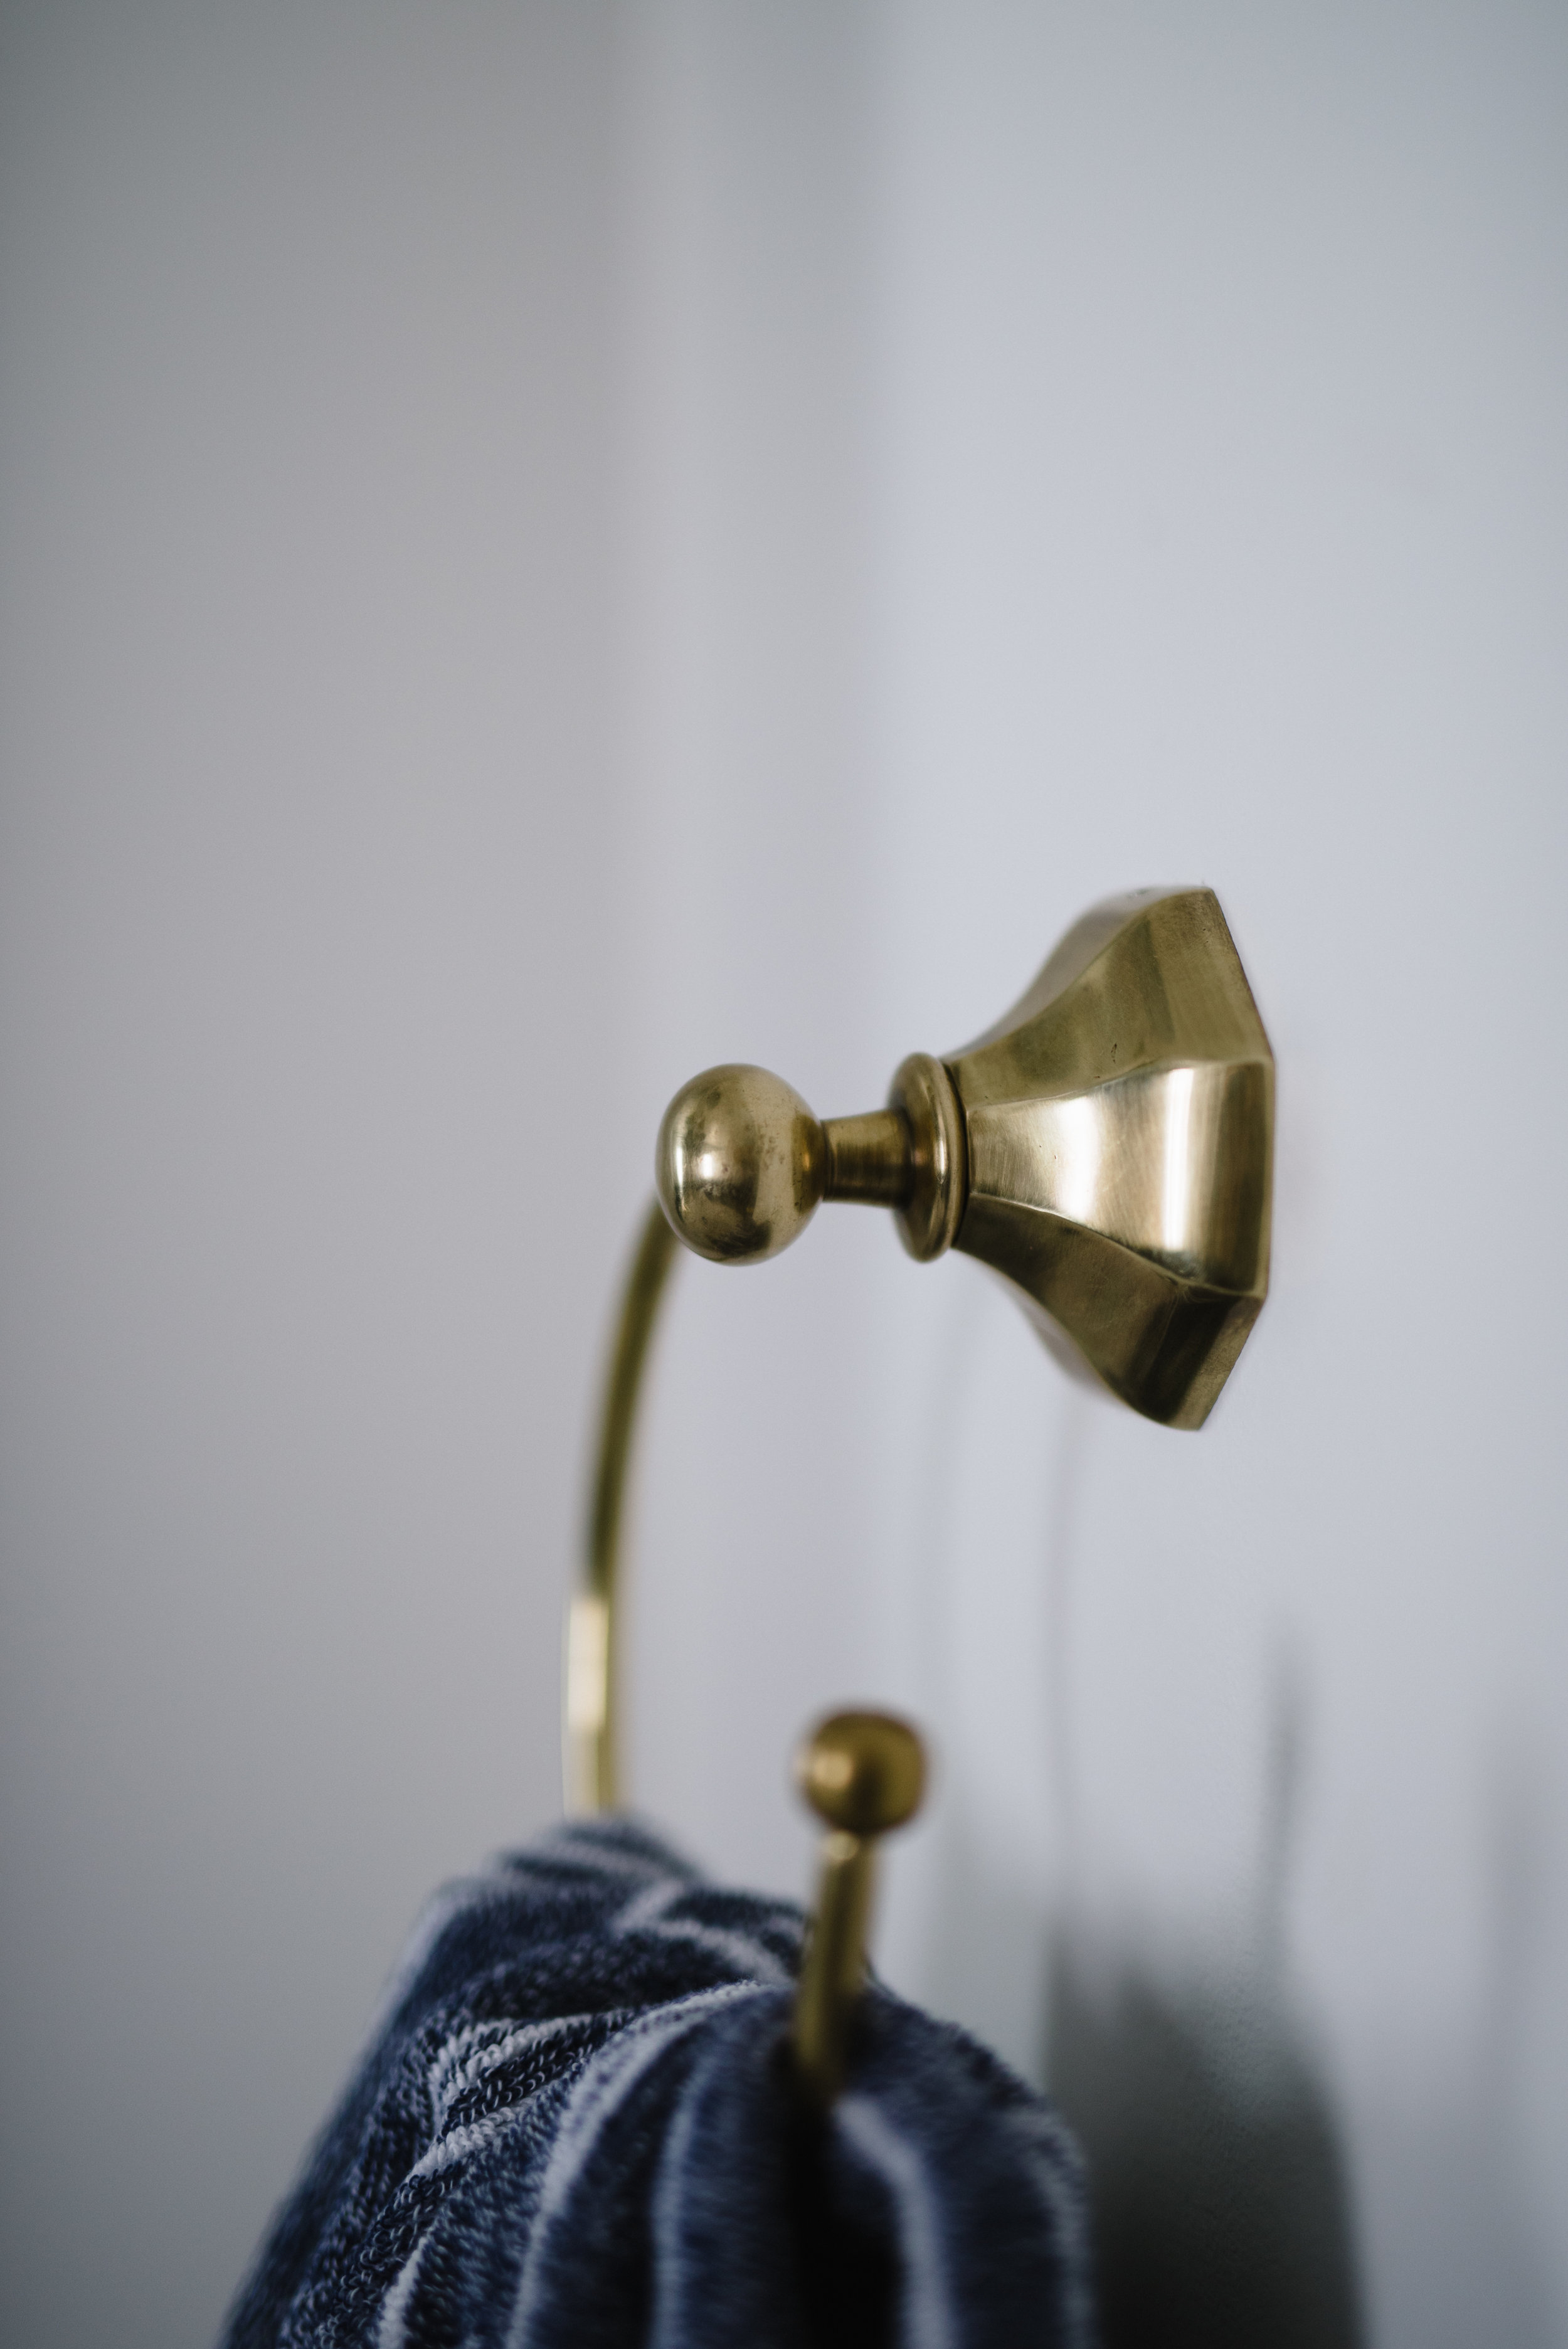
For the hardware, I looked at all sorts of spendy places but settled on Martha Stewart pulls from Home Depot. I had to draw the line somewhere, and couldn’t stomach the spendy prices. This is where I love blogs. I had saved some notes from Erin Gates of Elements of Style. She’s got a great, traditional New England look and fabulous taste, so when she says that the Martha Stewart line is quality, I believe her. And there was a $100 price difference between that at Restoration Hardware and Rejuvenation. Not to mention, a bunch of their hardware was back ordered.
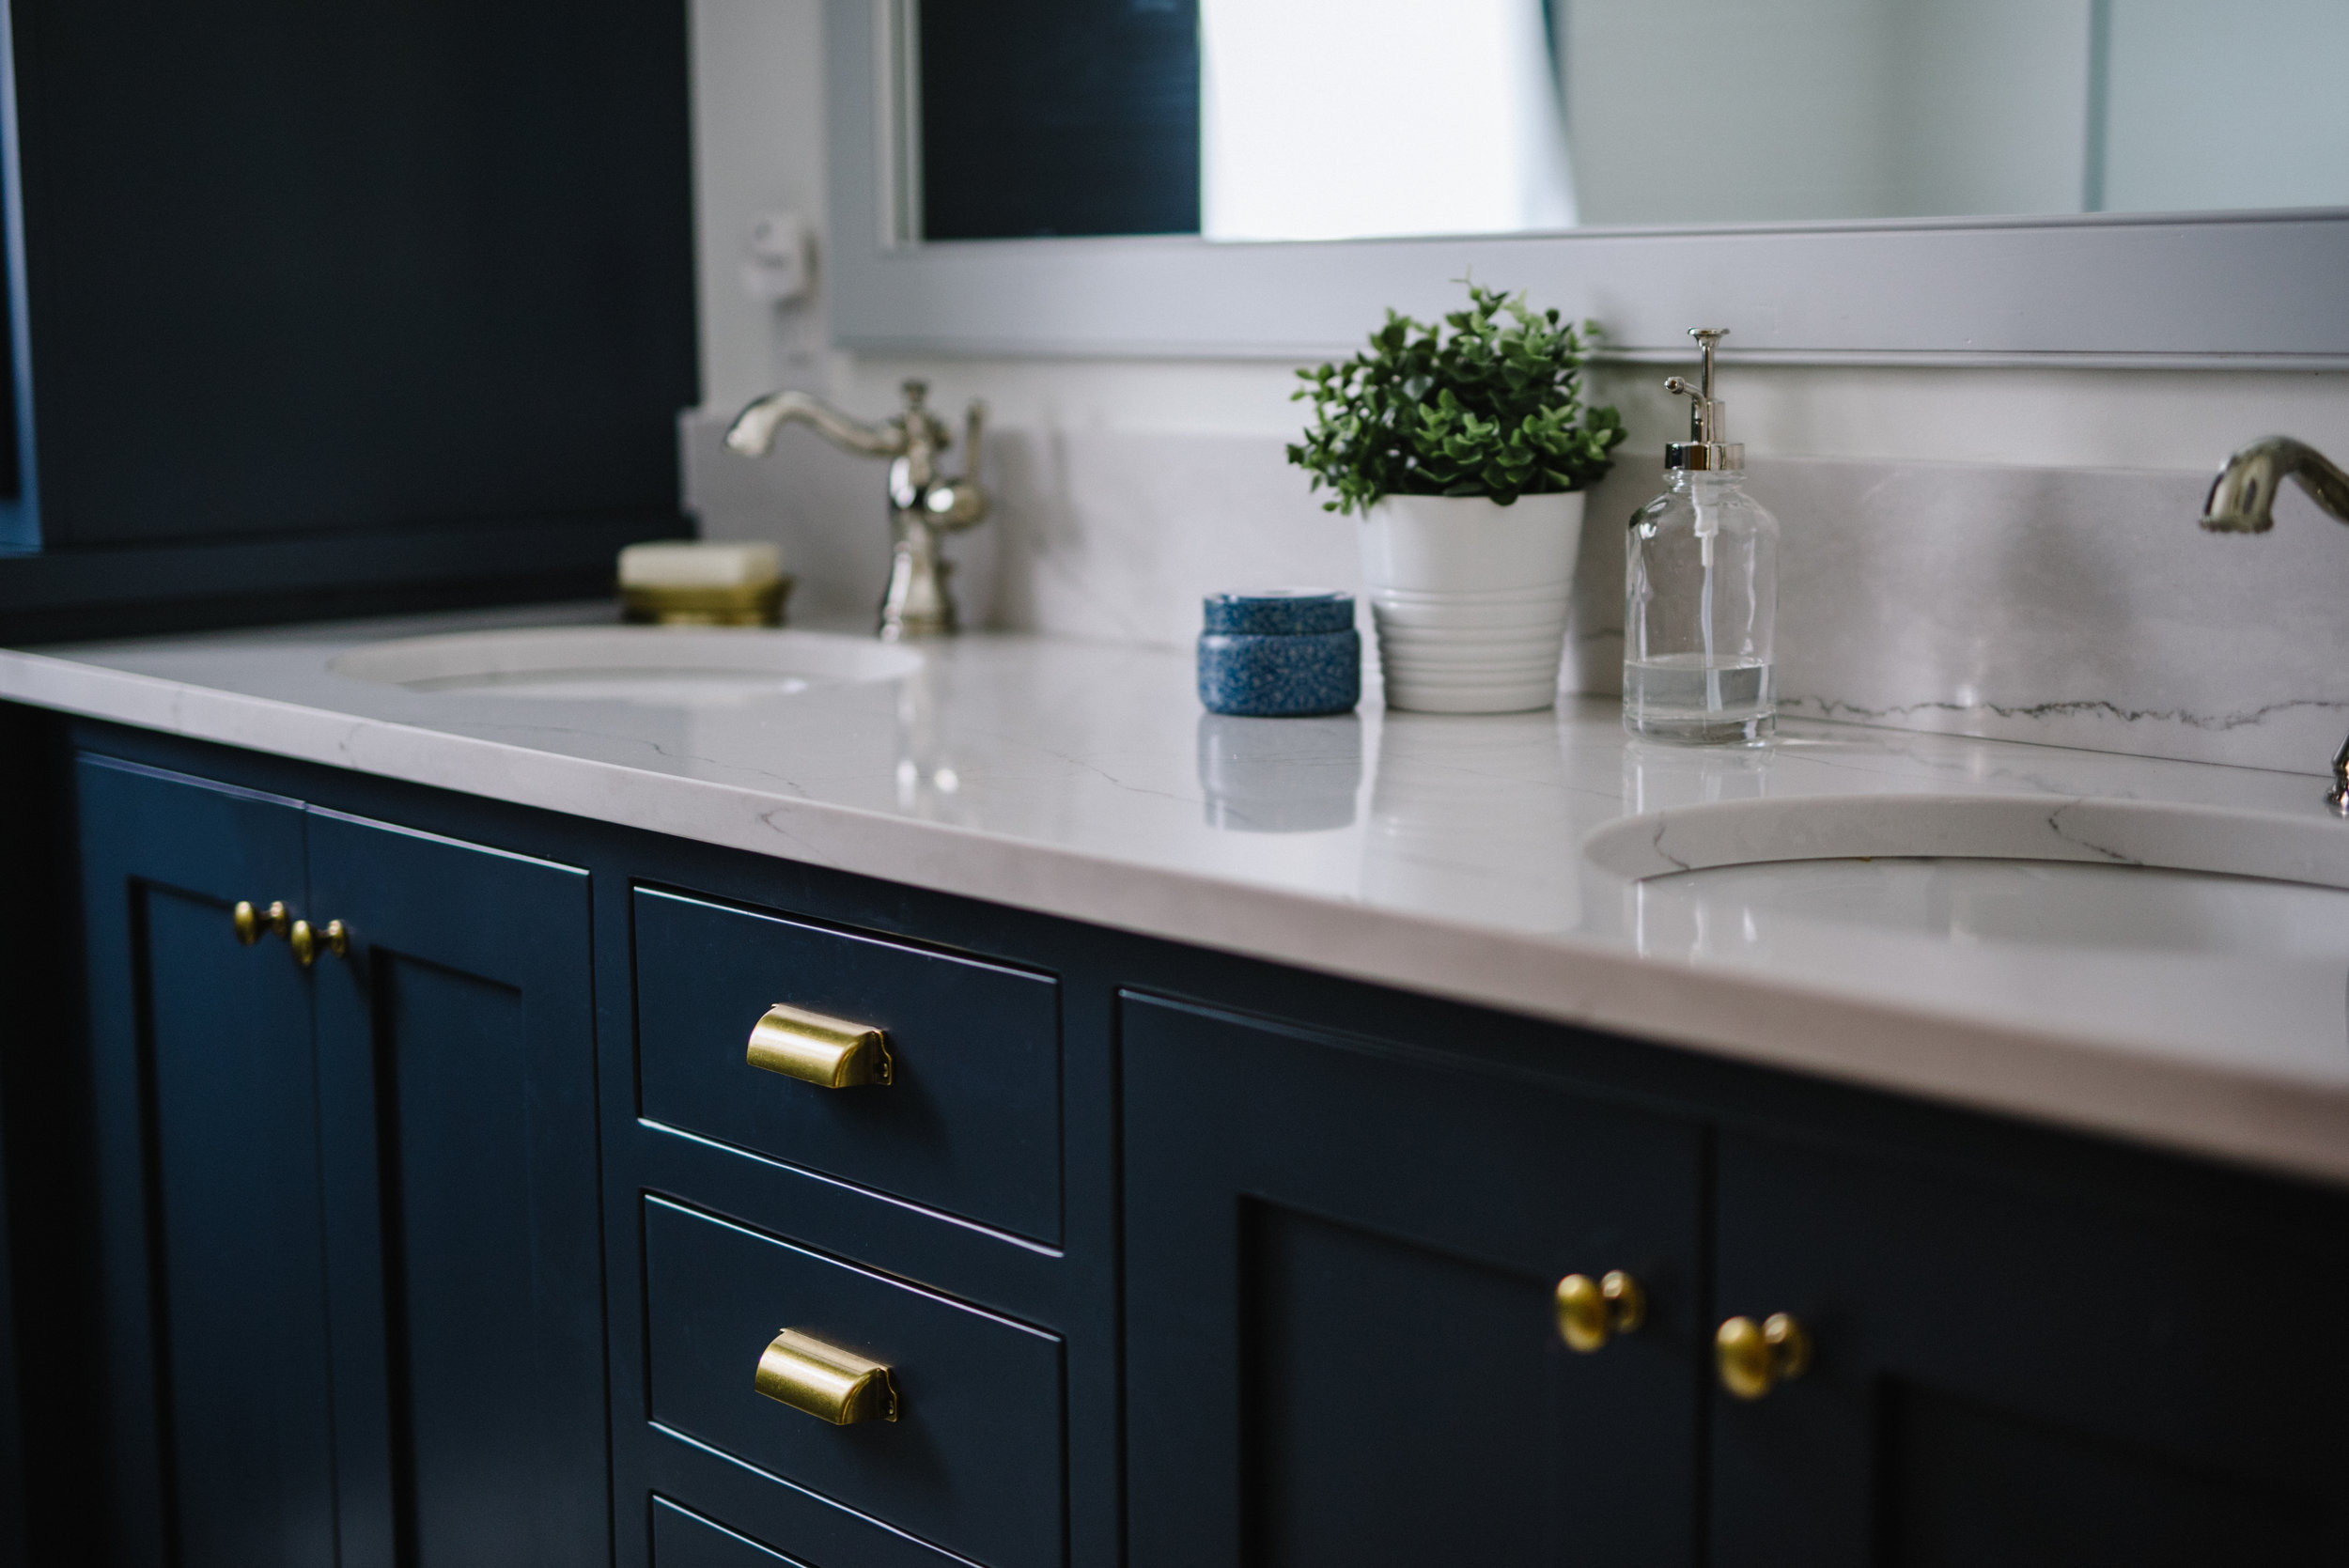
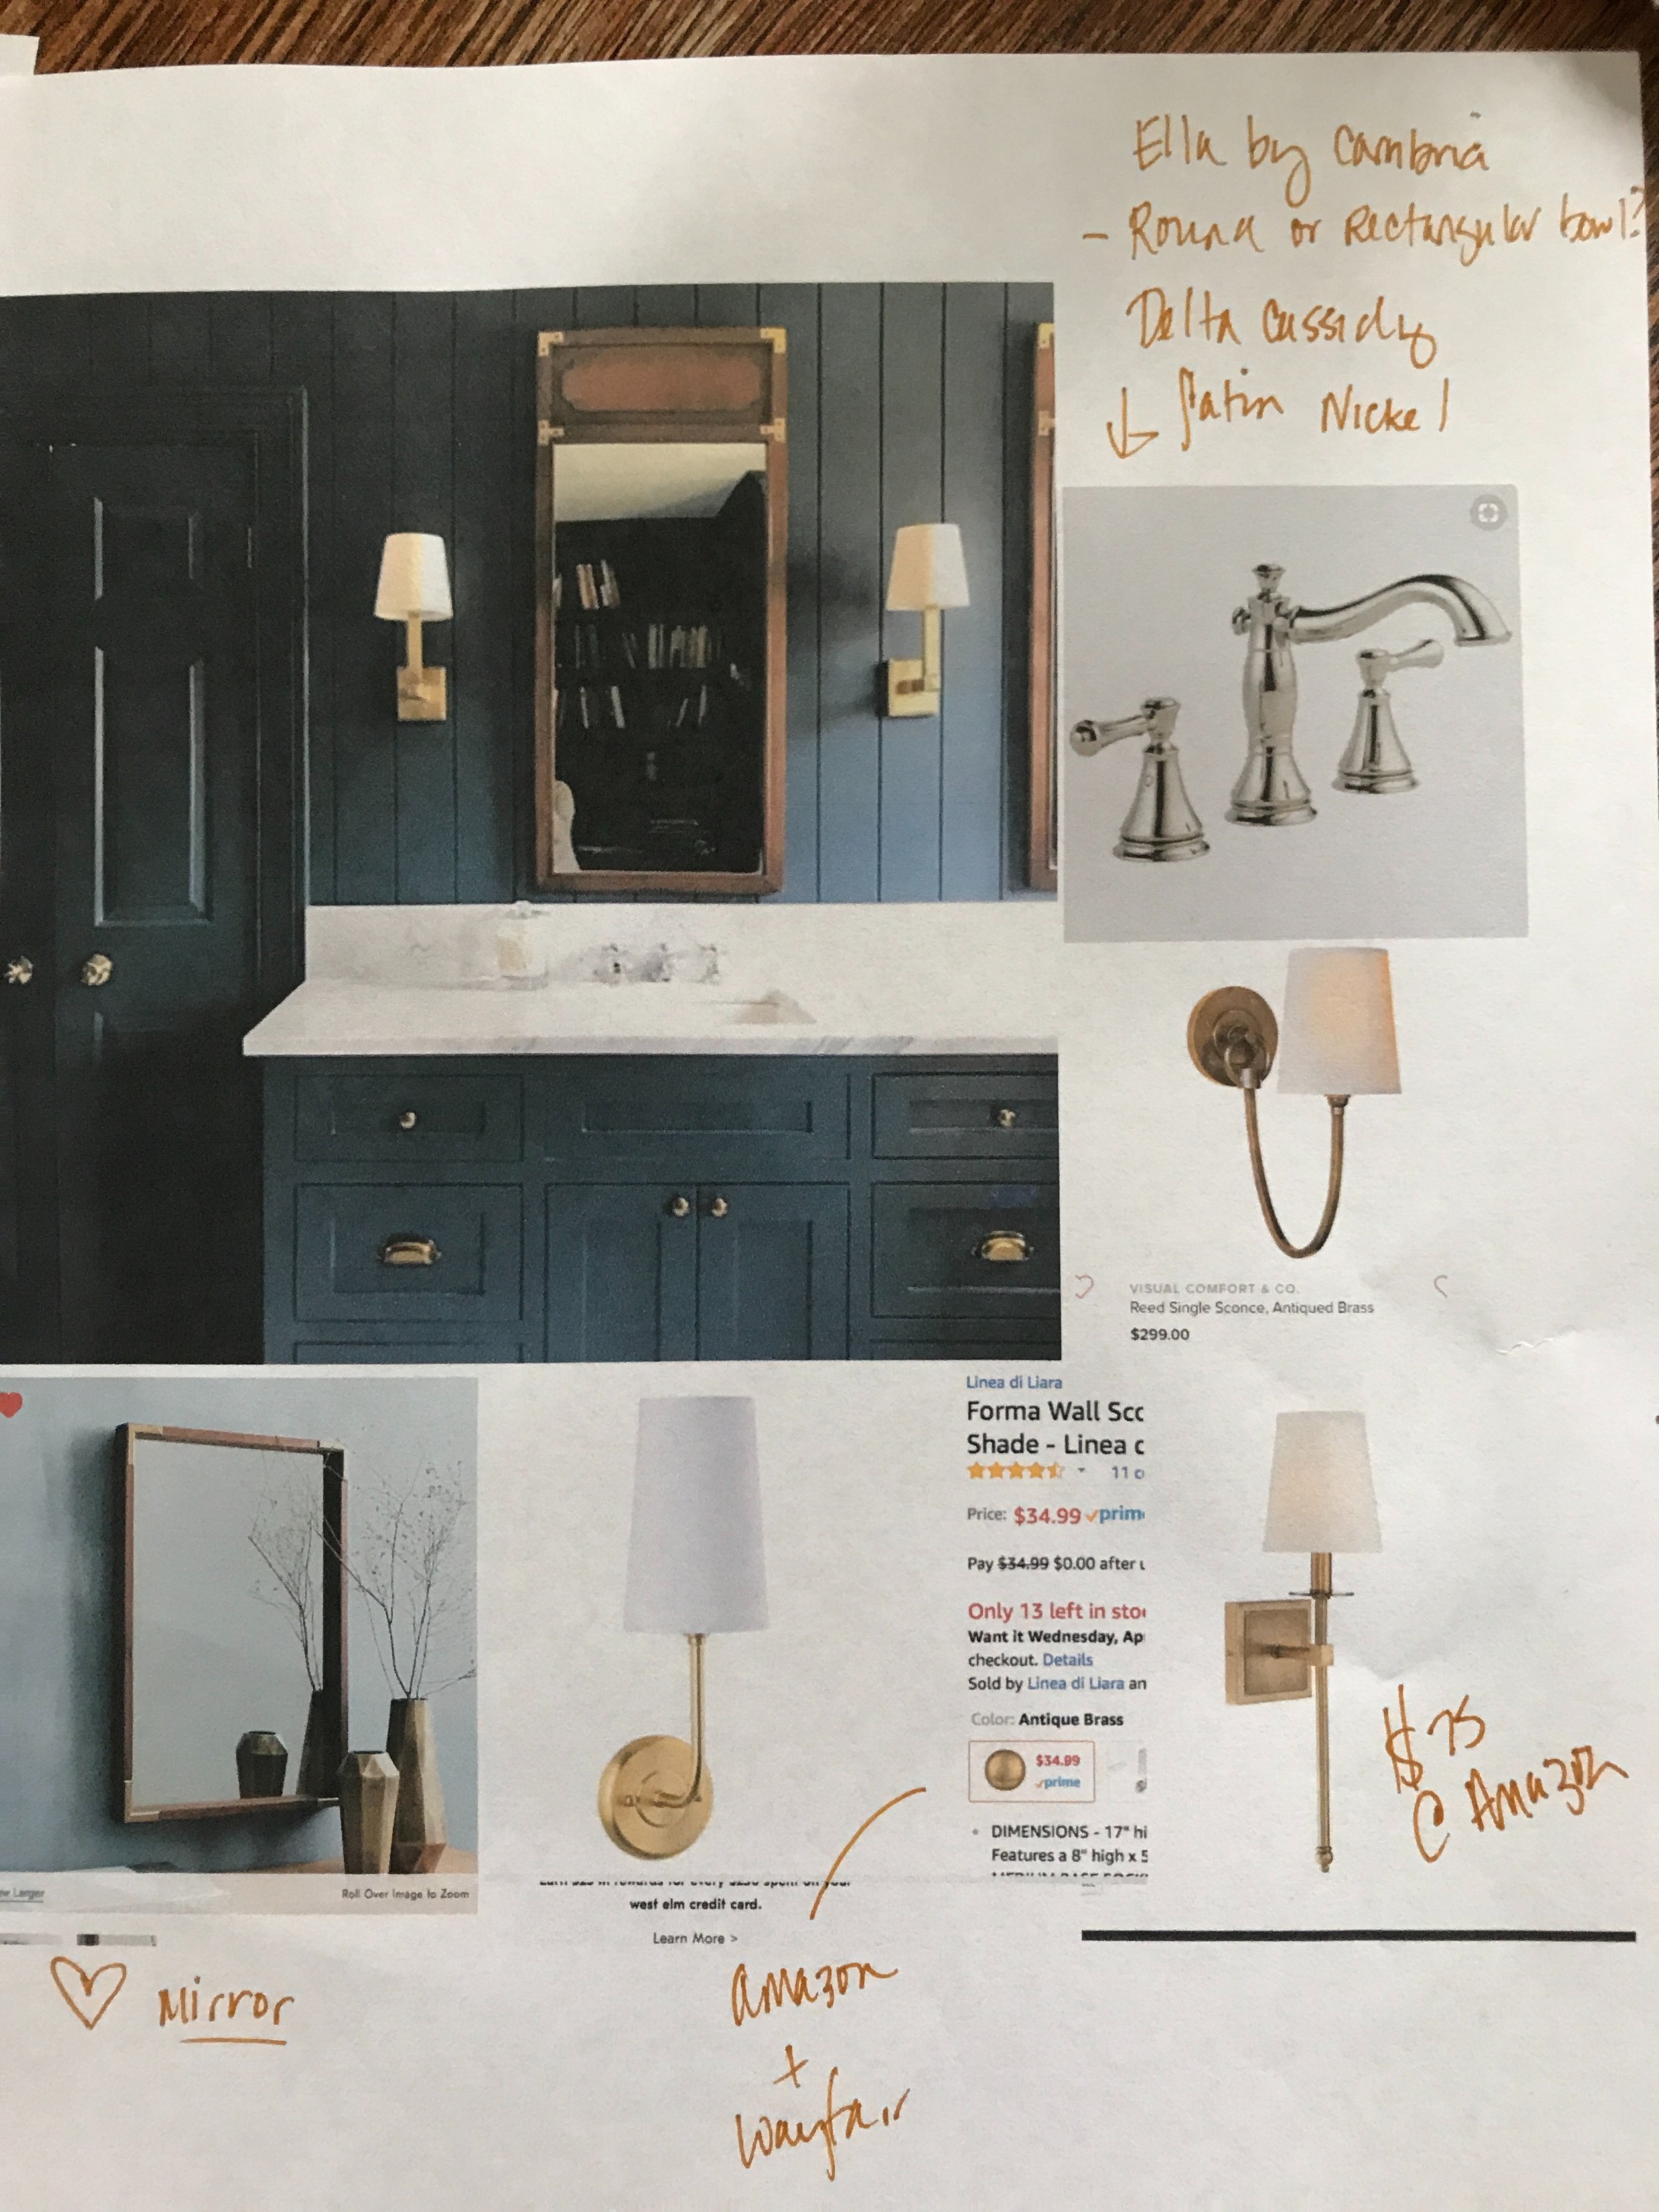
Inky blue cabinets with Ella cambria quartz counters, Delta cassidy faucets in Brilliance Polished Nickel, hardware by Martha stewart at home depot. custom cabinets & Mirror by brian stoll, jonesville, MI. Photos by Rachel Cuthbert Photography.
Also, I decided to mix metals which makes everything less matchy-matchy, but holy cow, it was no fun trying to find the right shade of brass. Seriously, there’s unlacquered brass,super shiny, aged brass, etc... I went with a polished nickel for my plumbing fixtures, which is a warmer metal so it plays well with gold and silver. The gold overhead pendant lights are from Pottery Barn—another suggestion from Rebekah. They add a bit of warmth and a bit oversized which adds balance to tall glass medicine cabinet.
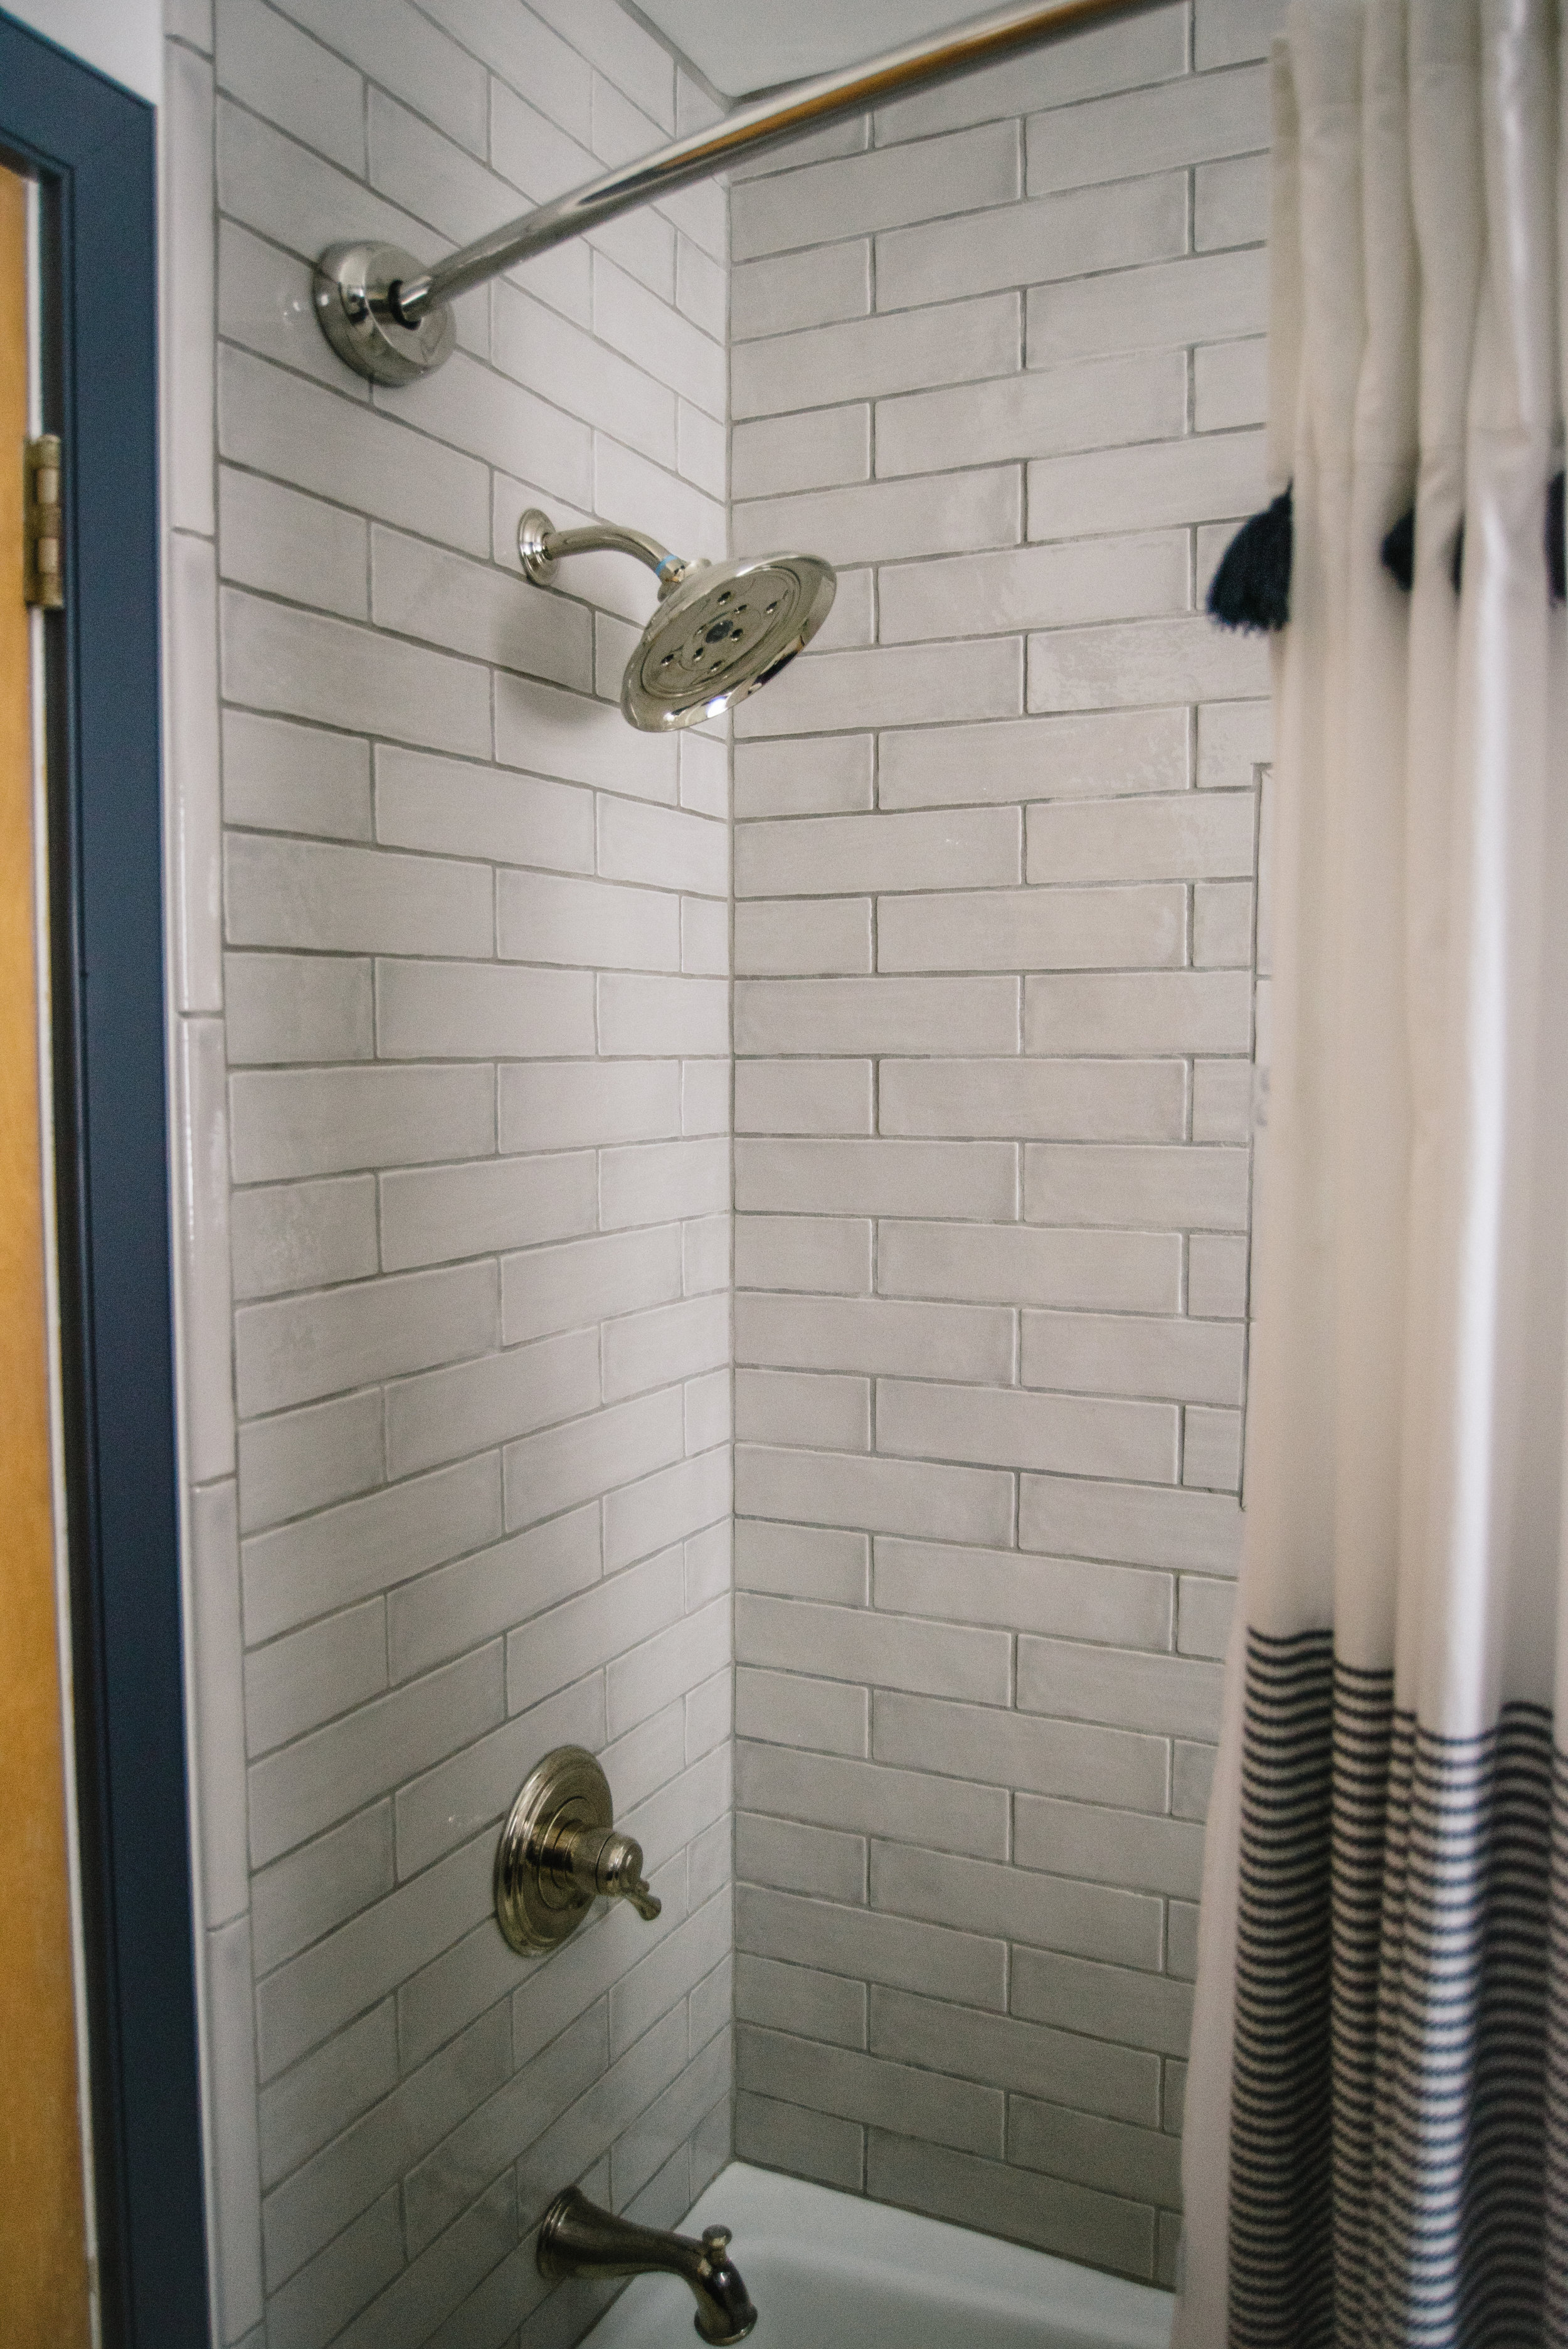
Also, I spent a lot of time thinking about the best way to enclose the bath/shower. As I mentioned, we tore out the separate shower and added a shower head in the bath. But, I didn’t want to create a full wall to enclose the bath for fear of losing natural light. This decision was tricky because it’s the kids & guest bath. So I want it to be welcoming, but I also wanted to make sure we didn’t flood the bathroom. If you have kids, you probably get this concern. ; ) Originally, I ordered an L-shaped curtain rod to use with an extra wide shower curtain but those seem to look better with a claw foot tub. Also, I thought it could attract mildew over time.
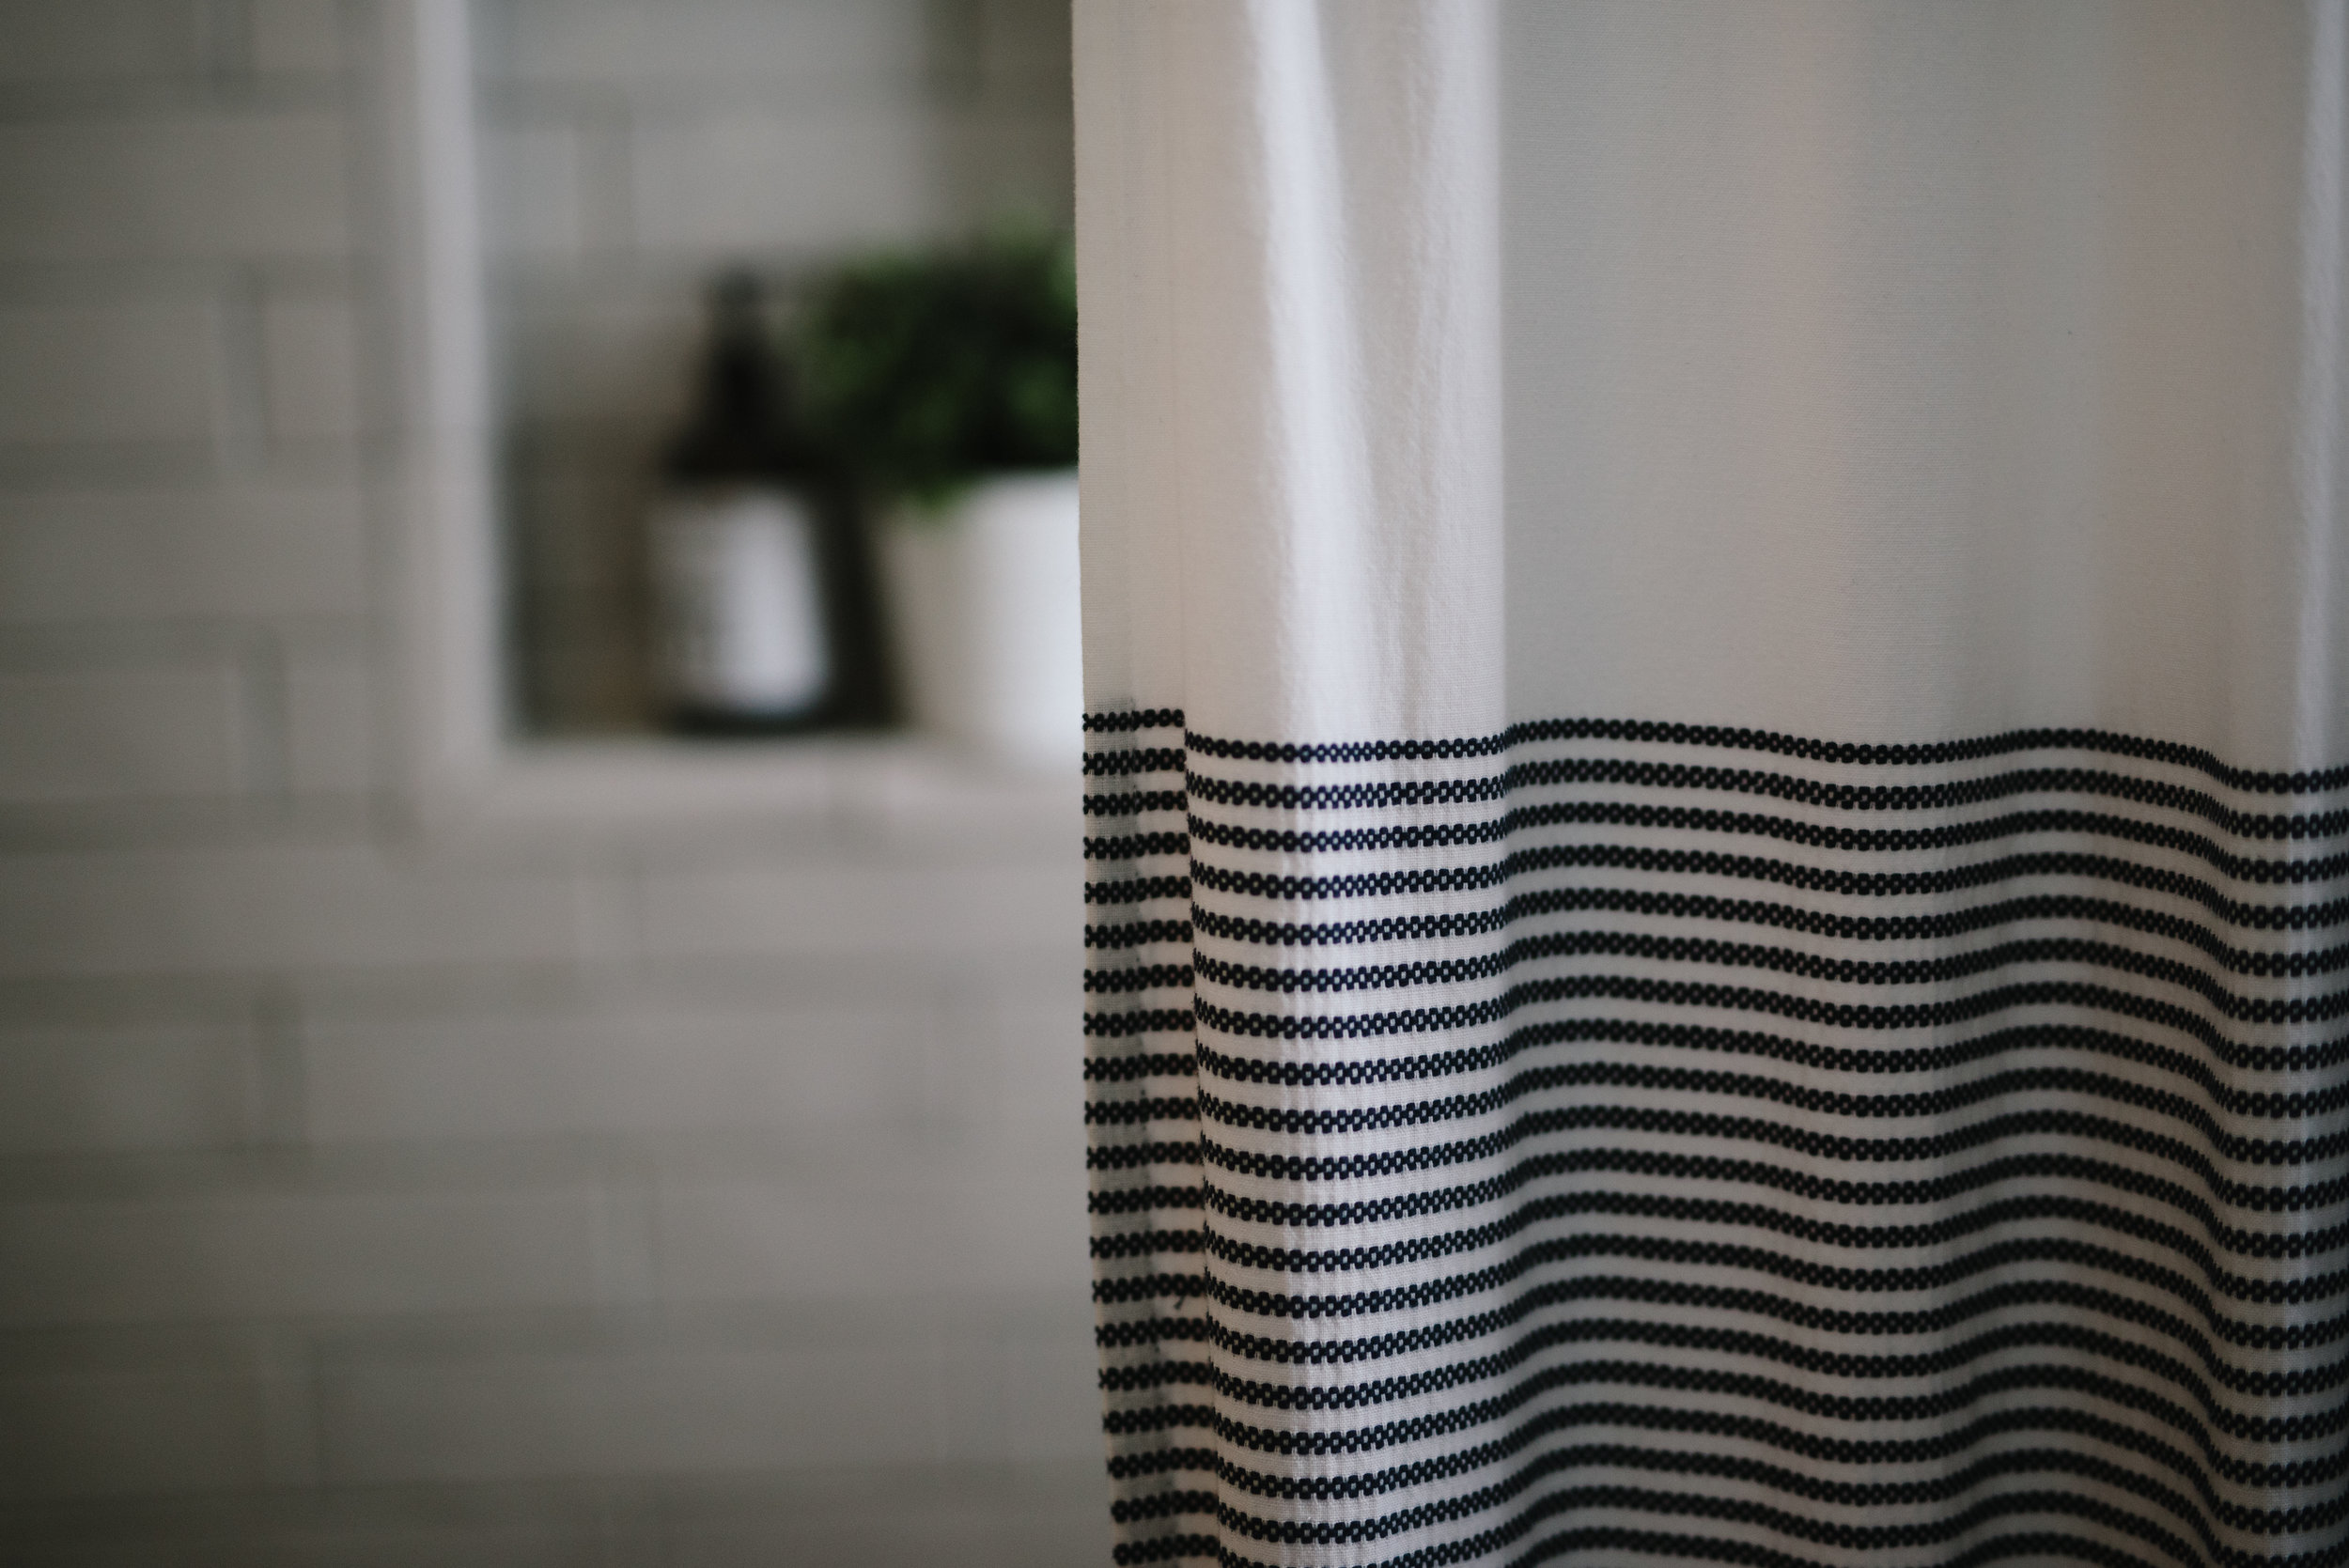

Newly renovated bath/shower with tempered glass wall.. Shower curtain by Peri Home, bloomingdales. 3x12 Retro Perla gray Tile via the Tile shop. Photo via Rachel Cuthbert Photography
My other option was adding a piece of glass to the side of the tub. I was worried that I wouldn’t be able to have a piece of glass and and shower curtain. After discussing with friends with eyes for renovating, I decided to go with the a piece of tempered glass to keep water from splashing all over the half wall. I am so glad I asked for their input.
Also, I’ve got stuck in the proverbial weeds when it came to smaller details. It reminds me of planning an event (I planned weddings in a past life). You feel like you’re doing really well—you’ve got the venue, caterer, music. Phew, but then you get closer to the event and the devil really is in the details (place settings, table décor, music list, party favors and such). It’s the same with house renovations. I had the contractor, picked out the vanity & counter tops, even the plumbing fixtures. But then I started feeling pretty overwhelmed with the minutia: is the height of my wainscoting too tall, not tall enough, how many sconces should I go with and does the style fit the look of the bathroom? Don’t forget to put dimmers on lights, what about towel hooks, bars & such? What color should I go with for the grout, what type of grout should I purchase, and on & on… These are the details that really make a difference and can make or break the look of a room.
This is where a second & third set of eyes helped. As I mentioned above, while I pulled together bathroom story boards, I also consulted with my friend Rebekah & my mom for some of the final details. As for wainscoting, I finally decided to go with 42” vertical shiplap with a ¼” spacing (again, a decision I had to make on the fly). For mirror(s), I originally wanted two antique style tilt mirrors, and sconces flanking each side, but sink and tall cabinet placement didn’t allow for that so I had our previous mirror cut down and framed with gray trim to tie together the tiles from the bath with the rest of the room.
Here’s where I made one of a few mistakes. I handed my contractor a piece of tile and told him to have our cabinet maker match the mirror trim to the tile. Now, my cabinet guy is great, but why in the world didn’t I think to take a few minutes and look through a Ben Moore fan deck that I had sitting on my dining room table!?!I think I was just tired at that point and wanted the bathroom to be done.Bummer! Because, while I like my mirror size, I’m not super jazzed about the gray. It skews more icy cool blue than a deeper, warm gray.

And of course, like many projects, I still have some details to finish. I need to add artwork, upgrade the window treatments, and we will eventually change out the 1960’s bathroom door when we update the rest of the house. It’s true that when you start doing one project, it mushrooms! Though we’ve happily taken a couple of months off in between projects to gear up for our next big project—a kitchen & living room remodel.